Reading view

Transmission 4.1.0 is out with Sequential Download & IPv6 [Ubuntu PPA]

Transmission Bittorrent client finally released new major 4.1.0 version yesterday! Here are the new features and Ubuntu PPA for Ubuntu 22.04, Ubuntu 24.04 and 25.10.

The new version is made available after more than a year of development. It fixed the significantly degraded transfer performance in 4.0.x series by changed the uTP ack scheduling algorithm. And, the developer claimed that the download speed in his case went up from 70 MB/s to 90 MB/s.

The new version also added IPv6 Local Peer Discovery support, as well as dual-stack UDP trackers for the simultaneous use of both IPv4 and IPv6 addresses. And, it added back support for old BEP-7 query parameters with &ipv4= and &ipv6=.

The CLI client now has a new -sel / --sequential-download command option, allowing to download pieces sequentially. It’s useful for those who want to watch a video during the download process.

The feature however does not support the GUI and Web UI so far, and, it only works in command line for either transmission-cli or transmission-remote by running similar command below:

transmission-cli -seq ~/Downloads/xxx.torrent

Transmission 4.1.0 also added an option to verify a torrent immediately after it finishes downloading. Don’t know if I missed something, but I can’t find out this option in Ubuntu while the merge request provides only a screenshot for macOS.

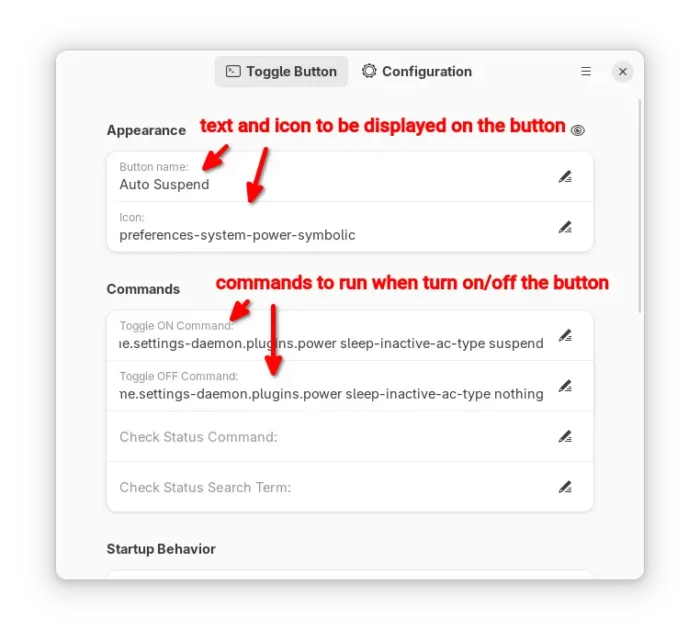
The settings.json file (under .config/transmission for Linux) added new preferred_transport allowing to choose between TCP and UDP when initializing outgoing connections. It as well added new sleep-per-seconds-during-verify option, disable the disk write cache when settings "cache-size-mb": 0, and fixed the bug that alt-speed-enabled had no effect.

Transmission Config file

The GTK UI has been updated with native file chooser dialogs, and ability to set default behavior for GTK dialogs to add torrent from url and add tracker. The QT UI now features native icons for menus and toolbars depends on the operating system, ETA to compact view, and labels feature from web-UI.

And, Web UI now supports drag’n’drop adding torrents, high contrast theme, long press on touchscreen to open context menu, percent digits in process bar, UI improvements and many fixes.

Other changes in Transmission 4.1.0 include:

  • new JSON-RPC 2.0-compliant RPC API, co-exists with the existing RPC API for remote control.
  • Add “Show Toolbar” toggle, and option to set default for macOS.
  • Add option to prevent idle system sleep, and Low Power Mode support for macOS.
  • Add start with all torrents paused support to settings file and daemon.
  • Improve code to use less CPU and Memory.

There are as well tons of other improvements and bug-fixes. See the Github release page for details.

How to Install Transmission 4.1.0 in Ubuntu

Transmission provides official installers for Windows and macOS, along with source tarball, they are available to download via the link below:

As the default Bittorrent client, Ubuntu 26.04 will probably include the new Transmission 4.1.0 in system repository and pre-install it if you select “Extended selection” mode when installing Ubuntu desktop.

And, for current Ubuntu 22.04, Ubuntu 24.04, and Ubuntu 25.10, I’ve built the new release package (.deb) into this unofficial PPA.

To add the PPA and install Transmission 4.1.0, open terminal (Ctrl+Alt+T) and run commands below one by one:

sudo add-apt-repository ppa:ubuntuhandbook1/transmission
sudo apt update
sudo apt install transmission

Optionally, install transmission-cli for command line use, or transmission-daemon for running in background for server use.

For choice, there are also community maintained snap package (available in App Center) and Flatpak package that work in most Linux, though both are not updated at the moment of writing.

Uninstall

To remove the PPA and restore transmission to the stock version, run the command below to install ppa-purge and use it to purge the PPA:

sudo apt install ppa-purge && sudo ppa-purge ppa:ubuntuhandbook1/transmission

Or, manually remove the PPA:

sudo add-apt-repository --remove ppa:ubuntuhandbook1/transmission

And, remove the torrent client via command:

sudo apt remove --auto-remove transmission transmission-common
  •  

The Second Beta of Plasma 6.6 Released with Numerous Bug-fixes

After almost of 2 weeks beta-1 testing, the second beta of KDE Plasma 6.6 is out before the final release planned for 17th February 2026.

Plasma 6.6 Beta 2 contains mostly bug-fixes, stability and user experience improvements, along with few minor new features.

First, for those who missed the first Beta, it introduced new feature to save current user settings (e.g., colors, window decoration, icons, cursors, desktop and window layout) as a custom global theme with user defined name and thumbnail image.

It also replaced the classic SDDM display manager with new plasma-login-manager, introduced new plasma-keyboard as a replacement for the Maliit virtual keyboard, and added OCR support for the built-in screenshot tool.

There are as well “Hide from Screencast” window header context menu option, “Tiled” wallpaper type, automatic screen brightness adjustment, three finger pinch gesture, global Shortcuts for seeking forward and backward, and more!

Compare to the previous Beta, the second one does not include exciting new features. But, it re-enabled the reveal password option for the login screen, and fixed that user selected cursor theme does not apply to new plasma login manager.

Beta-2 also improved multi-monitor setup support. It fixed inconsistent panel position issue when setting new position on a different monitor, KRunner always opens in the second monitor for the first time, and hitting enter to submit password in primary monitor brings up login prompt on another monitor instead of logging in.

The release fixed various crash issues, include the scenes when fastly pressing Ctrl+Meta+A multiple times, waking up a laptop connected to an external screen, screen powers off after inactivity, and when Media Player widget visibility is changed in system tray while music is playing.

There are as well many fixes for other issues, including cursor jumps around when starting virtual screenshare, 1920×540 (32:9) mode mistakenly selected for Acer 24 CB242Y bmiprx monitor, and screenshot tool does not remember Save As location.

Waterfox integration

Besides bug-fixes, the new Beta also include few minor new features. It added Waterfox support to the plasma-browser-integration, allowing to control media playback, manage downloads, and share links through Plasma’s native tools.

Other changes include:

  • Use a timeout of 10 seconds rather than 60 seconds, for consistency with the screen locker.
  • Use Meta key for desktop switching and Present Windows shortcuts.
  • Fix broken delay functionality for “Detect Window Properties”.
  • Fix the hardware cursor on GPUs without modifier support.
  • Improve mouse emulation, fixes for mouse emulation and unable to disable “use as pointer and keyboard” for Game controller plugin.
  • Fix that Firefox shows graphical corruption when using Wayland subsurfaces.
  • Fix slideshow not working with dynamic wallpapers (day/night wallpapers).
  • Fix long scan issue when mounting removable device with large disk size.

Get Plasma 6.6 Beta 2

The new desktop release has been made into kde-unstable repository for Arch Linux. And, it will probably be made available in Fedora 44 and (K)Ubuntu 26.04 after final release.

For the source, live images, and more details about Beta 2, see the see the official announcement.

  •  

Ptyxis Terminal Emulator Released 49.3 with APX Containers Support

Ptyxis, the free open-source container-oriented terminal emulator, released new 49.3 version few days ago.

As you may know, Ptyxis is a GTK4 terminal emulator that’s default in Ubuntu since 25.10. It features first-class container integration with automatic discovery, direct spawning, and context preservation support for Podman, Toolbox, Distrobox, and JHBuild.

It also features smart process tracking and dynamic theming, that automatically adjust header bar color according to terminal sessions and/or user privilege, as well as searchable tab overview, integrated developer tool, and GPU acceleration.

By releasing version 49.3, the terminal now also support APX containers. APX is the default package manager for Vanilla OS that supports installing packages from multiple sources inside containers without altering the root file-system.

The APX containers basically works with earlier versions of Ptyxis, but they use the label manager:apx instead of manager:distrobox which cause unintended behavior, such as starting new terminal session as root by default rather than normal user account.

Now, the terminal has updated with official APX containers support, and everything should work as same as others.

Besides that, Ptyxis 49.3 improved force-quit fallback priority and tab focus handling when creating new tabs and windows. And, it now automatically clear X11 urgency hint (the notify of needing attention) when window becomes active.

It also added Norwegian Nynorsk translation, improved agent handling of --no-tty/--tty flags for distrobox containers, and added DESKTOP_SESSION info in the debugging information dialog, as well fixed some bugs.

For those who are interested in the next version 50 to be default in Ubuntu 26.04 LTS, the Ptyxis 50 alpha added a logout inhibitor when tabs have active programs running that are not the shell process, which can be disabled by changing the inhibit-logout key value via gsettings command.

And, it added dialog to change profile on per tab basis, new cell-width-scale profile option, as well as ability to set primary/system-accent colors for user palettes. For more about the terminal, see the NEWS file in source page.

How to Install Ptyxis terminal emulator

Ptyxis provides official installer package through Flatpak package, which runs in sandbox environment.

Linux Mint and Fedora Workstation (with 3rd party repository enabled) can search & install it from either Software Manager or GNOME Software.

Ptyxis in Linux Mint Software Manager

For Debian, Ubuntu, and other Linux, do the steps below one by one to install the terminal package:

  • First, open terminal (Ctrl+Alt+T) and run command to install Flatpak daemon:
    sudo apt install flatpak

    Other Linux may follow this setup guide to enable Flatpak support.

  • After that, run the command below to install the Flatpak package:
    flatpak install https://dl.flathub.org/repo/appstream/app.devsuite.Ptyxis.flatpakref
  • And, for those who’ve already installed an earlier version, run this command to check & install updates:
    flatpak update app.devsuite.Ptyxis

After installed the terminal, log out and back in if you don’t see it in start menu.

NOTE: Install Ptyxis Flatpak package in Ubuntu 25.10 and 26.04 won’t override the default one. If you want to set the flatpak as default, see this tutorial and set app.devsuite.Ptyxis.desktop in the config file.

Uninstall:

To uninstall the Flatpak package, use command:

flatpak uninstall --delete-data app.devsuite.Ptyxis

Also run flatpak uninstall --unused to remove useless run-times.

  •  

Notepad Next – Notepad++ Replication for Linux & Mac Released 0.13

Notepad Next, the free open-source Notepad++ re-implementation with native Linux, Windows, and macOS support, released new 0.13 version few days ago.

In case you don’t know about the app, it’s a Qt6-based text editor that replicates the Notepad++ functionality and user interface with cross-platform support.

The text editor is now more than 6 years old, and it promotes itself: “Though the application overall is stable and usable, it should not be considered safe for critically important work.

The latest version so far is v0.13 that was tagged 2 days ago. It added syntax highlighting support for Abaqus input files, improving code readability for editing .inp files.

And, it added ability to click edit on EOL (End of Line) label in bottom status bar, so that user can quickly change the line-ending character between Unix LF (\n), Windows CRLF (\r\n), and Macintosh CR (\r, ASCII 13), without launching preferences dialog.

When current opened and focused file is changed externally (e.g., edited via another text editor), Notepad Next will now pop-up a dialog asking to either reload or keep current file content.

The preferences dialog has been updated with some new options. They include options to toggle line numbers and URL highlights visibility, and configure default directory for file saving.

Other changes include new --workspace option to launch the text editor with specified folder as a workspace, fix that app tried to open file from wrong location when a window already exist with another working directory.

There are as well fix for the search results fonts that are not the same as the main window, new translations, dependency updates, and more.

How to Install Notepad Next Text Editor

The text editor provides official Linux package through Flatpak package, which can be installed directly from either Linux Mint’s Software Manager or Fedora GNOME Software.

While Debian/Ubuntu and other Linux may do the steps below one by one to get it from flathub repository.

  • Open terminal (Ctrl+Alt+T) and run the command below to install flatpak daemon:
    sudo apt install flatpak

    For other Linux, follow the setup guide to enable Flatpak support.

  • Next, run the command to install the Flatpak package:
    flatpak install https://dl.flathub.org/repo/appstream/com.github.dail8859.NotepadNext.flatpakref

And for future updates, run the command below to check & install:

flatpak update com.github.dail8859.NotepadNext

For choice, it also provides AppImage for Linux, which is available to download in Github releases page, along with Windows and macOS packages as well as source tarball:

Uninstall

To uninstall the Flatpak package, run command:

flatpak uninstall --delete-data com.github.dail8859.NotepadNext

Also run flatpak uninstall --unused to remove useless runtime that may free up some disk spaces.

  •  

GIMP 3.0.8 Released with Faster Font Loading, New APIs & Security Fixes

GIMP, the popular GTK-based image editor, released version 3.0.8 last night.

The new version of this free open-source image editor might be the final release in the 3.0 series. It primarily includes bug-fixes and performance improvements, while there are also some minor new features.

First, it noticeably speeds up the app start-up time for users with large number of fonts by backported the changes from GIMP 3.2 RC.

It also backported the gimp_cairo_surface_get_buffer () API to retrieve a GEGL buffer from a Cairo surface, as well as gimp_config_set_xcf_version () and gimp_config_get_xcf_version () APIs to specify a particular XCF version for a configuration.

The release also includes some theme and UX improvements. More GUI elements now respect user’s icon size preferences. Dark mode now looks better by showing less bright texture. And, UI has been updated with more usable Spin Scale widget.

For users who need to run GIMP in command line without display, there’s a new --no-interface command option which may be useful for Linux running GIMP with Flatpak or AppImage package without a separate gimp-console-3.0 executable.

And, the Flatpak package has been improved with safe guards to show the correct configuration directory, regardless of whether XDG_CONFIG_HOME is defined, which makes it much easier for flatpak users to install and use third party plug-ins.

new ‘–no-interface’ option

For macOS, Image Graph is now available when running GIMP with --show-debug-menu option. The app icon is now properly displayed in macOS 26 Tahoe. EPS and PS files can be opened again. And, configuration migrations from GIMP 2.10 to 3.0 has been greatly improved.

Other changes include a new help manual made by Jacob Boerema, as well as fixes for following issues:

  • Lossless WEBP image export affected by lossy settings.
  • Duplicate text in Windows installer for certain languages.
  • Font kerning on macOS
  • Default color profiles loading issue in Windows.
  • XCF incompatibility with GIMP 2.10.
  • Unintended Search pop-up.

There are as well some potential security fixes and other changes, see the official announcement for details.

How to Install GIMP 3.0.8

GIMP provides official installer for Linux, Windows, and macOS which are available to download via the link below:

For Linux, the packages include AppImage which can be run directly without installation after added executable permission. Though, Debian/Ubuntu need to install libfuse2 first.

sudo apt install libfuse2

There’s as well a Flatpak package available in Linux Mint Software Manager and Fedora Gnome Software, while others may install it from flathub repository.

Ubuntu users may simply launch App Center (or Ubuntu Software), search and install it as Snap package:

For Ubuntu, Linux Mint, and their based distributions who prefer the native .deb package, I’ve built GIMP 3.0.8 into this unofficial PPA for Ubuntu 22.04, Ubuntu 24.04 and Ubuntu 25.10.

To add the PPA and install GIMP 3.0.8 deb package, open terminal (Ctrl+Alt+T) and run commands below one by one:

sudo add-apt-repository ppa:ubuntuhandbook1/gimp-3
sudo apt update
sudo apt install gimp libbabl-0.1-0 libgegl-0.4-0t64

NOTE: The PPA packages are built against system default GTK-3 library, which is a bit outdated in 24.04/22.04 and lack the fix for possible crash when drag arranging layers.

  •  

Add Custom Toggle Buttons to Top-right System Menu (Quick Settings)

Want to add custom ON/OFF toggle buttons to the top-right system menu (aka Quick Settings) in Ubuntu, Fedora Workstation and other Linux with recent GNOME desktop? Here’s an extension can do the job!

GNOME since 43 introduced a redesigned system status menu called Quick Settings, allowing to quickly change commonly used settings via ON/OFF toggle buttons.

The menu by default includes the toggle buttons to change the network, bluetooth, night light, keyboard back-light, Light/Dark status, as well as CPU power mode.

If that’s not enough, then you can add more buttons for custom actions, such as automatic suspend and/or webcam toggles. And, here’s how to do the job step by step.

Step 1: Install the Custom Command Toggle extension

The extension so far supports GNOME from version 45 to 49, meaning for Ubuntu 24.04 ~ 25.10, all current supported Fedora Workstation, Debian 13, and Arch etc Linux distributions with GNOME.

First, search and install “Extension Manager” app from your system software app, such as App Center or GNOME Software.

Then, launch Extension Manager and use it to search and install “Custom Command Toggle” extension under Browse tab.

If your Linux Distribution does not have “Extension Manager” app in system repository, then visit the link below in web browser, and use the ON/OFF toggle to install it:

Though, you need to install the browser extension first and refresh to see the toggle. And, Debian/Ubuntu need to install agent package first by running the command below in temrinal:

sudo apt install chrome-gnome-shell

Step 2: Add/Configure Toggle Buttons to Quick Settings

After installed the extension, either go to Installed tab in Extension Manager then click the gear icon to open preferences.

Or, run the command below to launch the preferences from terminal:

gnome-extensions prefs [email protected]

When the preferences dialog opens, you may switch to “Configuration” tab to increase the number of custom toggle buttons (up to 6). And, each button will has its own tab in the dialog.

Next, input the text and icon to be displayed on that button. For Ubuntu with default Yaru theme, see this page for all the available symbolic icon names. And, go to this page for Gnome default Adwaita icons.

And, type the commands for toggle ON/OFF actions. For example, use the command below to enable automatic suspend for both battery and AC mode, for button ON.

gsettings set org.gnome.settings-daemon.plugins.power sleep-inactive-battery-type suspend && gsettings set org.gnome.settings-daemon.plugins.power sleep-inactive-ac-type suspend

And, use the command below to disable automatic suspend for button OFF state.

gsettings set org.gnome.settings-daemon.plugins.power sleep-inactive-battery-type nothing && gsettings set org.gnome.settings-daemon.plugins.power sleep-inactive-ac-type nothing

As you see, you may use && to connect multiple commands into one. And, use pkexec for command that need root permission.

For example, use the command below to disable webcam/camera for button OFF:

pkexec modprobe --remove uvcvideo

And use the command below instead to re-enable for button ON:

pkexec modprobe uvcvideo

NOTE: the modprobe kernel module load/remove commands only work when the module is not in use. If your webcam/camera is being opened by an application, then the commands won’t work.

The initial button state at start up (after login) is by default set to previous state. Advanced users may set it to “Command output”, so it will run the “Check Status Command” automatically at login, and set button state automatically according if that command output matches the “Check Status Search Term”.

For more about the extension, see the official wiki.

  •  

6 Software for Running Windows Apps/Games in Ubuntu & Other Linux

Need to run Windows only applications or games in your Linux Desktop? Here are some free open-source software to do the job!

Many Linux users have their computers dual-boot with a Windows system, so they can use Linux for daily work and boot Windows regularly for gaming or other purposes.

If you keep Windows on your computer because of only few applications or games, then you may try running them in Linux through Wine or Proton etc compatibility layers. And, below are the software that may help!

Windows only mmorpg game Scions of Fate in Ubuntu 24.04

1. Wine

Wine is a popular 32 years old software for running Windows apps and games in Linux and FreeBSD, which also works in macOS, Android, and Haiku. It’s so popular that most Linux include it in system repositories, and Valve has a fork “Proton” based on it for running Windows games on steam for Linux.

To use Wine, simply right-click on the EXE file and select load with “Wine WIndows Program Loader”, then it will start the installer wizard and install the Windows app on your Linux and create an app shortcut for it.

However, there are a significant number of apps/games that do NOT work out-of-the-box through Wine. You need to configure the Windows version, DLL libraries, drivers, and even install patches for certain apps to work properly. See this page for the list of apps compatible with Wine.

Wine configuration dialog

To install Wine, either open terminal (Ctrl+Alt+T) and run command to install the version (usually old) from system repository:

sudo apt install wine

Or, go to Wine website for the latest version. And, here’s a step by step guide shows how to install it in Ubuntu.

Tips: if Wine is not the thing you’re looking for, then you may run wine uninstaller in terminal to launch the dialog for uninstalling programs, or simply delete the entire .wine folder in user home (press Ctrl+H to view/hide) to get rid of the leftovers.

2. Valve Proton for Steam

For the Windows games that run in steam, valve proton is the best and simplest choice.

While wine is a general-purpose compatibility layer, proton is made with pre-configured patches, DXVK to convert Direct3D call to Vulkan, and others better for gaming support.

In my case, the game runs great out-of-the-box in steam for Linux, but NOT when runs on its own launcher through wine.

To enable proton for Steam on Linux, simply go to Settings -> Compatibility, enable steam play and choose a proton version.

3. Bottles

For apps/games that neither work out-of-the-box through wine nor support running in steam, there are some alternatives that can help.

Bottles is one of them, that supports running Windows apps or games through wine, Proton GE (custom version of Valve Proton), Wine GE (custom version of Wine), and other variants with patches and improvements. See this page about the Bottles’ runners.

Install Bottles runners through its Preferences

Bottles runs each program in its own run-times. After selected the “correct” runner, the game runs great in my case with default configurations. Though, user can easily choose a different DXVK / VKD3D versions, enable discrete graphics card, and install more run-times, such as .NET frameworks, powershell, Microsoft Visual C++ 2005/2010, and so on.

To install Bottles, search for and install it from Linux Mint Software Manager, Fedora Workstation GNOME Software, or run the 2 commands below one by one in Debian/Ubuntu:

sudo apt install flatpak
flatpak install https://dl.flathub.org/repo/appstream/com.usebottles.bottles.flatpakref

Log out and back in if the app icon is not visible. And, other Linux may see this page for the Bottles Flatpak package.

4. Lutris

Lutris is a free open-source game manager for Linux, which features community-submitted installer scripts for thousands of games and launchers.

If the game you’re going to try out is available in the Lutris database, then it most probably works out-of-the-box without any configuration. Just search and install, then it will automate the process of dependencies, wine configurations, and others to make it ready for use.

Besides Windows only games, Lutris also supports managing your games from GOG, Steam, and Epic Games Store. As well, it Dolphin, DOSBox, PCSX2, PPSSPP, and a few dozens of other game emulators.

To Install Lutris, either search and install from Linux Mint Software Manager, Fedora Workstation GNOME Software, or run the 2 commands below in Debian/Ubuntu:

sudo apt install flatpak
flatpak install https://dl.flathub.org/repo/appstream/net.lutris.Lutris.flatpakref

While other Linux may see this page for the Lutris package in Flathub.org.

5. Heroic

Heroic is an alternative to Lutris that supports both Wine GE and Proton GE runners, which however features terrible UI in my own opinion.

It just works after properly selected the runner, though it has few downsides. It does not auto-detect the game icon. I have to manually set game album covers, or all the games will look same with the default cover.

And, after installed a game using the .exe installer wizard, Heroic does not automatically update the launcher. It will always launch the installer again and again instead of starting the game.

On the good side, it supports installing different versions of Wine GE and Proton GE, in case for games that do not work properly with the latest runners.

Heroic is also available to install in Linux through Flatpak package.

While Linux Mint and Fedora can install it from Software Manager or GNOME Software, Debian/Ubuntu users may run the 2 commands below one by one to install:

sudo apt install flatpak
flatpak install https://dl.flathub.org/repo/appstream/com.heroicgameslauncher.hgl.flatpakref

6. Faugus Launcher

Faugus Launcher is simple and lightweight app for running Windows games using UMU-Launcher.

I like this app, as it has a clean and simply user interface, and it supports custom version of Proton GE and Proton EM, as well as umu-launcher.

It also provides a simple settings page with advanced features, such as MangoHud (on-screen fps), GameMode (tweak system for better performance), and other miscellaneous.

The only issue is that my game refused to run through Faugus Launcher, even set with same runner to Lutris and Bottles.

To install Faugus Launcher, see the Github source page.

Summary

In this post, I introduced 6 software for running Windows apps or games in Linux desktop.

While wine is a general-purpose compatibility layer which is not so friendly for beginners to set up, Valve Proton is the great choice for Steam games on Linux.

There are few others that come with custom versions of Wine and Proton with pre-configured patches, DXVK, and other improvements for better gaming support! Lutris in my case is the one that works out-of-the-box, while Bottles has a modern UI and works once selected the ‘correct’ runner.

  •  

Fastfetch updated with COSMIC Desktop & Bedrock Linux Support

Fastfetch, the neofetch like system information tool, updated recently with many new features.

For those who don’t know about the app, it is a free open-source command line tool that can fetch and display system information for Linux, Windows, macOS, Android, FreeBSD, OpenBSD, etc operating systems.

The app can output the current running system and desktop names and versions, kernel version, shell version, uptime, window manager, themes, as well the basic CPU, GPU, memory, disk, IP address, and battery etc information, along with system logo in a stylish layout.

Fastfetch is inspired by neofetch, which is useful for sharing a screenshot of system information. As neofetch discontinued, many Linux distributions (e.g., Debian, Fedora, Ubuntu) turn to add fastfetch into system repositories.

The app promoted itself as a maintained, feature-rich and performance oriented tool. It’s updated with v2.57.0 in last week with Pop!_OS COSMIC desktop version and Niri Wayland compositor version detection.

And, it added urxvt font, xterm font, cosmic-term version and terminal font, as well as Secure Boot detection support.

Windows 7 and 8.x support are deprecated, as they’ve reached end of life in 2023. And they lack some APIs used by fastfetch, while, the app current load these APIs dynamically at runtime to maintain compatibility. So, both of the Windows versions are now deprecated and will be removed in a future release.

Besides that, it added openSUSE Tumbleweed braille logo and support for Xinux, a NixOS based Linux distribution from Uzbekistan. And, by releasing 2.58.0 yesterday, it added detection support for Bedrock Linux, a meta Linux distribution allows to mix-and-match components from other, typically incompatible distributions.

Other changes in recent Fastfetch 2.57.0 & 2.58.0 include:

  • Add Kiss2 logo.
  • Fix compatibility with KDE Plasma 6.6.
  • New --structure-disabled <structure> option to disable specific modules in the structure.
  • Enable slow version detection by default.
  • Chassis type detection for Linux on ARM devices.
  • xterm 256-color codes support in color configuration.
  • DPI scale factor detection on Windows 7.
  • Other improvements and various fixes.

How to Install Fastfetch

As mentioned, Fastfetch has been made into many Linux Distributions’ system repositories. Ubuntu 25.10 and 26.04 may simply run the command below in terminal (Ctrl+Alt+T) to install it:

sudo apt install fastfetch

For the latest version as well as the official release notes, go to:

For Linux Mint 21/22, Ubuntu 22.04, Ubuntu 24.04 and higher, either download & install the .deb package from the link above (under Assets section), or use the official PPA by running the 3 commands below one by one:

sudo add-apt-repository ppa:zhangsongcui3371/fastfetch
sudo apt update 
sudo apt install fastfetch

After installation, simply run fastfetch to output your system information, or use fastfetch --help to print more about the usage.

  •  

KDE Has A New Infinite Whiteboard Tool Work-In-Progress

Looking for an infinite whiteboard tool for Linux Desktop? KDE has one that’s in development!

It’s Drawy, a free open-source C++ written application that aims to be a native-desktop alternative to the amazing web-based Excalidraw.

This app provides a simple Qt6 and KDE Frameworks based user interface, for product managers, designers, and anyone who need to brainstorm or present ideas in real-time.

As you see in the screenshot above, it only provides a canvas with some tools in header, some control buttons in bottom, as well as a dynamic property widget in left.

The application so far support drawing by Pen, Text, Rectangle, Ellipse, Line, and Arrow tools with custom font size, color, thickness, and stroke style.

And, it provides a cursor tool to select and re-edit what you drew, eraser to remove something, and move tool to move all the things on canvas.

Other features include buttons to zoom in/out, redo/undo, save your ideas as .drawy files, as well as:

  • Light and Dark mode.
  • Pressure sensitivity support for drawing tablets
  • Basic keybinding support.

Dark Mode

As the app is in very early stage, there are as well many more features planned. They include export to PNG, snapping, text formatting, image support, rotate items, and online collaboration.

And, for those who are interested in this application, either discuss by join its Matrix room or ask for requests by visiting its source page.

How to try out Drawy in your Linux

As in early development stage, the app so far does not provide any installer package, though Arch Linux users can now try it out by this AUR package.

For other Linux, the source page (see the link above) provides some commands about how to build it from the source code. And, below are the steps that worked in my case in Ubuntu 26.04.

NOTE: The commands below does NOT work in Ubuntu 24.04 and earlier due to outdated Qt6 libraries, unless you install newer version via the link mentioned in the source page.

  • First, open terminal (Ctrl+Alt+T) and run command to install the build dependencies:
    sudo apt install build-essential cmake extra-cmake-modules git g++ qt6-base-dev qt6-base-dev-tools qt6-base-private-dev libkf6coreaddons-dev libkf6crash-dev libkf6widgetsaddons-dev libkf6config-dev libkf6configwidgets-dev pre-commit libzstd-dev

    The dependency libraries may change as time goes on. Please leave comment below if you found it does no longer work.

  • Then, clone the source code by running command:
    git clone https://invent.kde.org/prayag/drawy
  • Navigate to the source folder:
    cd drawy
  • Configure the source:
    cmake -B build -S . -DCMAKE_BUILD_TYPE=Release

    This command may fail if you miss some dependency libraries.

  • Build the application:
    cmake --build build --config Release
  • If everything goes well, run the executable file under build/bin sub-folder to launch the tool:
    ./build/bin/drawy

At any time, you may remove this whiteboard tool by deleting the drawy folder using file manager. And remove the -dev packages via apt remove command to clean up.

  •  

Easy Effects 8.1.0 Released with Crusher Plugin & Many Improvements

Easy Effects, the popular audio equalizer and effects application for Linux desktop, released new 8.1.0 version few days ago.

The new version of this free open-source software added new plugin for input/output effects, fixed some bugs, and introduced some other features.

Version 8.0.0 switched the UI frameworks from GTK4 to Qt6 and QML, which however introduced many issues, and some of them even prevent the application from building or working properly in certain Linux Distributions.

By the past minor releases, the developer team has addressed and fixed more than a hundred of reported issues. The system tray indicator now features new symbolic icons instead of using Breeze icons that are missing in most non-KDE desktop environments.

Some of the UI elements (such as the presets and about dialog) have been ported to use the Kirigami Dialogs, which in my opinion look better than before. The Flatpak package has been updated with system tray handling and XDG Color Scheme support, so it can follow system color schemes automatically.

There are as well many other UI/UX improvements. The plugins effects sidebar width now is adjustable. The spectrum graph now supports custom colors and other style settings. And, users are now able to set a fps cap to the spectrum and level meters, and select a custom color theme in preferences.

The Flatpak package support XDG Color Scheme to follow system color scheme (dark or light)

In the new 8.1.0 version, the new Crusher plugin by Calf Studio Gear is added for input and output processing pipelines, with options to configure shape mode, bit reduction, and sample rate.

A bitcrusher reduces the resolution or bandwidth of digital audio data. Audio reduced in bit depth sounds more harsh and “digital”. In the bitcrusher from Calf Studio Gear used in EasyEffects reduction can be done in a linear or logarithmic way. According to the plugin authors the logarithmic way results in a much smoother sound in low volume signals.

In bottom right of the output tab, a new button is added to send the output to the input of Easy Effects virtual source device, which is useful, for example, send the audio being played in the desktop to the people talking to them in a conference room.

Other changes include new option in the Crystalizer plugin to set a fixed Pipewire quantum, use media name option in exclude list, and ability to force app to use English language. For more details, see the CHANGELOG.

How to Install Easy Effects 8.1.0

Besides using your Linux Distribution build, the app provides official installer through Flatpak which runs in sandbox environment.

Linux Mint and Fedora (with third-party repository enabled) may directly search & install the package from either Software Manager or GNOME Software.

While Debian/Ubuntu and other Linux need to run the commands below one by one:

  • First, open terminal (Ctrl+Alt+T) and run command to install the Flatpak daemon:
    sudo apt install flatpak

    For other Linux, follow the official setup guide to enable Flatpak support.

  • Next, run the command below to install the flatpak package, as well as the dependency runtimes.
    flatpak install https://dl.flathub.org/repo/appstream/com.github.wwmm.easyeffects.flatpakref

For future updates, run the command below to check & install:

flatpak update com.github.wwmm.easyeffects

And, replace update with run in the last command to start it from terminal, which is useful for debugging purpose.

  •  
❌