Reading view

VS Code 1.109 Released with Claude Agent Support (Preview)

Visual Studio Code 1.109, the January 2026 release of Microsoft’s AI code editor, was released few days ago.

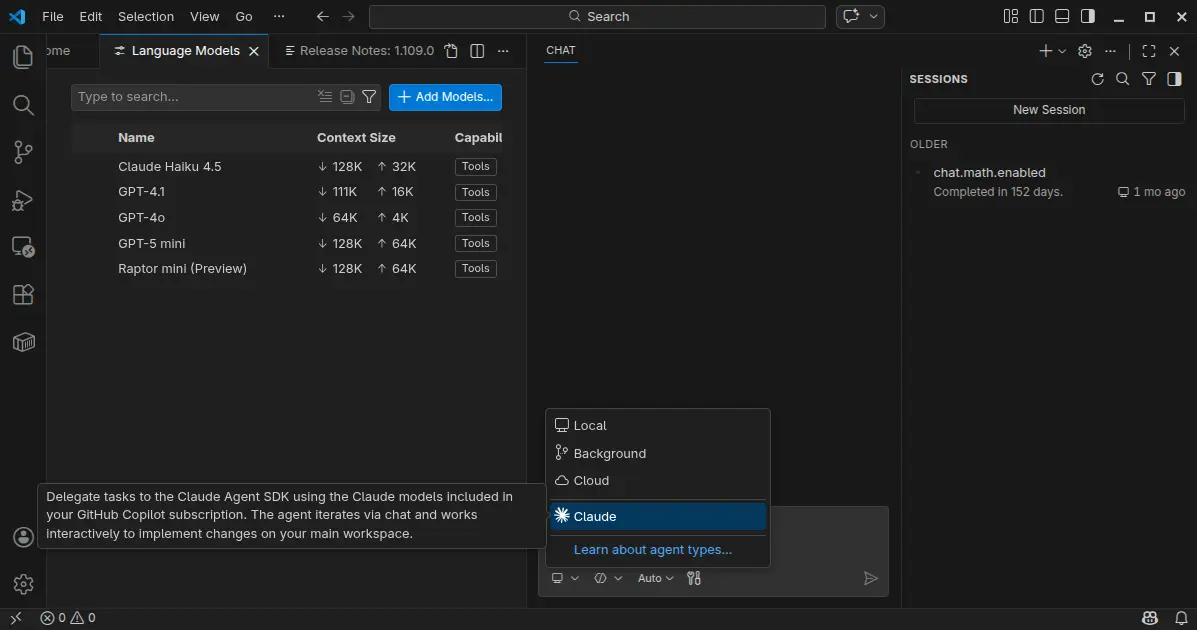
The new monthly release introduced preview support for Claude Agent, allowing to delegate tasks to the Claude Agent SDK using the Claude models included in your GitHub Copilot subscription.

It also improved the agent extensibility by allowing different agents to use different models, run independent tasks in parallel across multiple sub-agents, as well as MCP apps support for servers to display rich and interactive UI in the client.

Anthropic models now support thinking tokens to give more visibility into the model’s reasoning process. User can choose between detailed or compact thinking styles, see the model’s thought process interleaved with tool calls and responses, and, failing tool calls automatically expand to show more context.

The Anthropic models now use the Messages API with interleaved thinking support, and support for context editing to help manage longer conversations more efficiently.

Chat responses can now render interactive Mermaid diagrams with the renderMermaidDiagram tool. User can interact with pan and zoom action to explore them in detail, or open them in a full-sized editor for easier viewing.

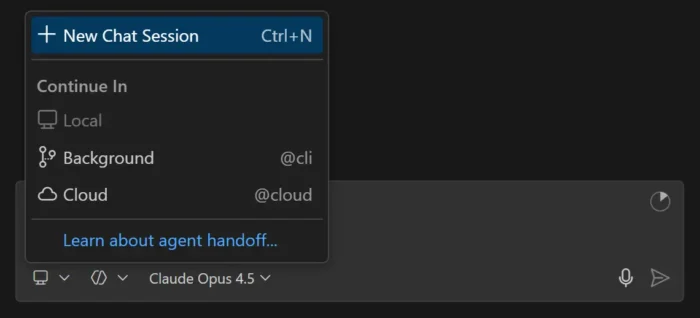
The new version now allows to run multiple agent sessions in parallel across local, background, and cloud environments. It added a new session type picker in the chat input area to switch between these different agent types, and a new agent status indicator in the command center to provide visibility into agent session updates.

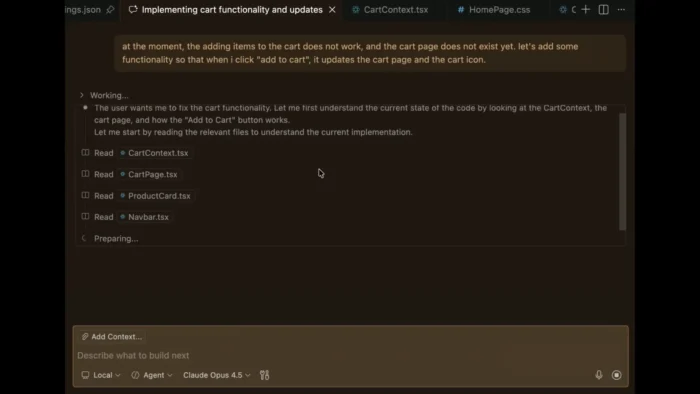
Agents can run subtasks using subagents to break down complex tasks into smaller parts. Cloud agent session now supports model selection, third-party coding agents (Preview), and custom agents available in your target GitHub repository default branch. Background agent session as well supports custom agent, attaching images as context, and auto-commit at the end of each turn.

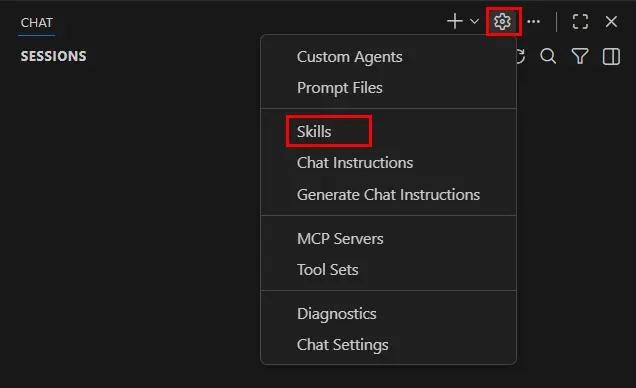
Agent Skills that was introduced in the last release, are now generally available and enabled by default. And, you can now manage skills in VS Code in the same way you manage prompt files, instructions, or custom agents.

This version as well added /init slash command to generate or update your workspace instructions in chat, organization-level custom instructions support, and new controls for custom agent file locations, how agents can be invoked, and specify multiple model for custom agents.

It optimized agent with new Copilot Memory (preview feature) to store and recall important information across sessions, ability to index workspaces that are not hosted on GitHub, and read files and list directories outside current workspace with user permission.

For Linux and macOS, there’s also experimental terminal sandboxing feature to restrict file system access to only your workspace folder and restrict network access to trusted domains only.

VS Code desktop also features a new integrated browser (preview), allowing to sign into websites and browse any web page, just like you would in a regular browser.

Other changes in VS Code 1.109 include:

  • Ask Questions tool (Experimental).
  • Fully interactive embedded terminals.
  • New Agent sessions welcome page (Experimental).
  • Kitty keyboard protocol support.
  • Drag’n’drop importing a settings profile.
  • Provide DMG images for macOS.
  • Windows 11 context menu integration.

Get VS Code 1.109

The official release note, as well as the download links for Linux, Windows, and macOS are available via the link below:

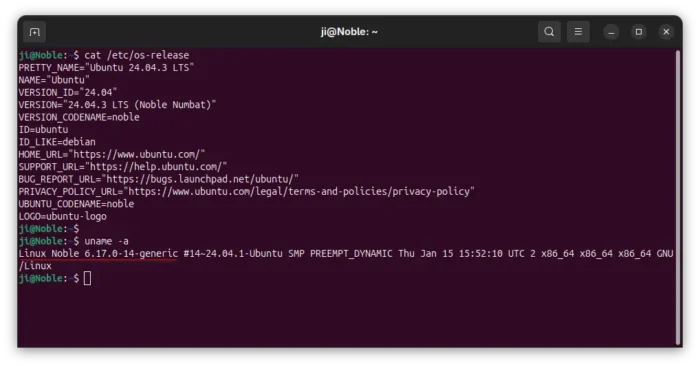
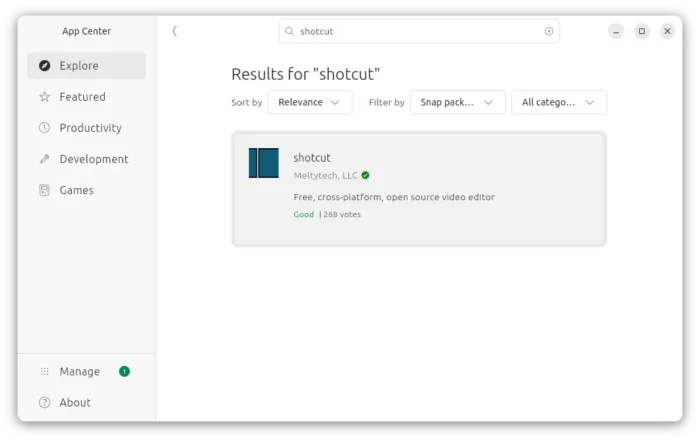
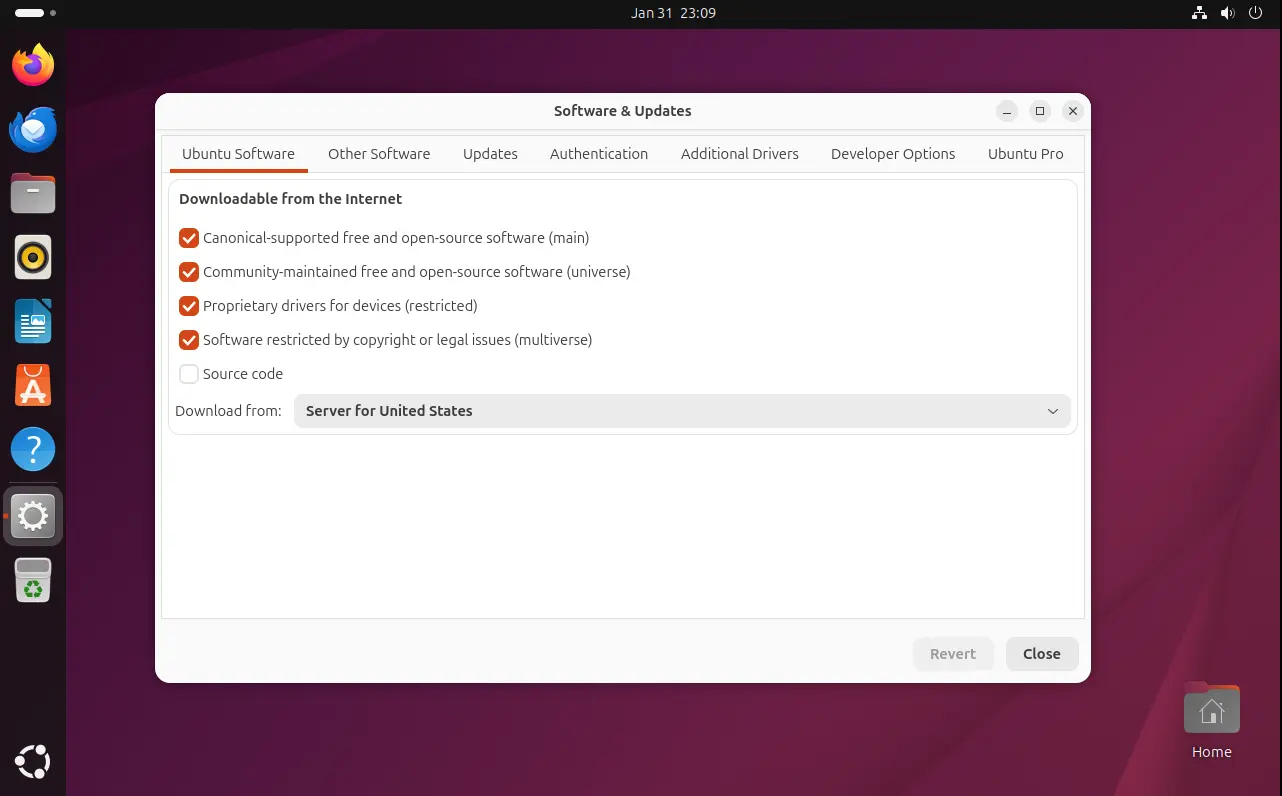
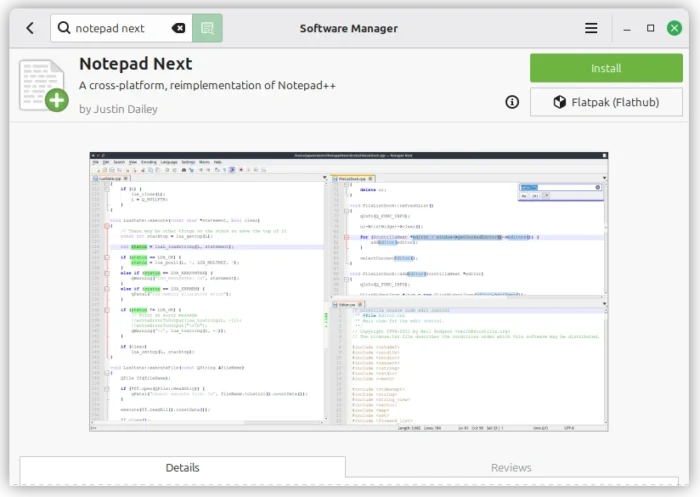
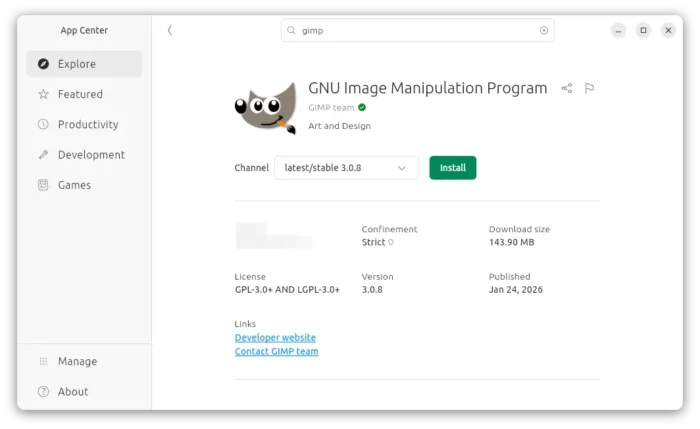
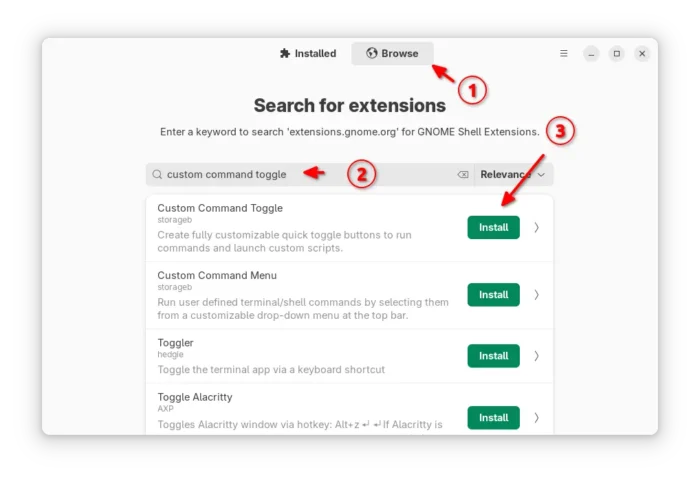
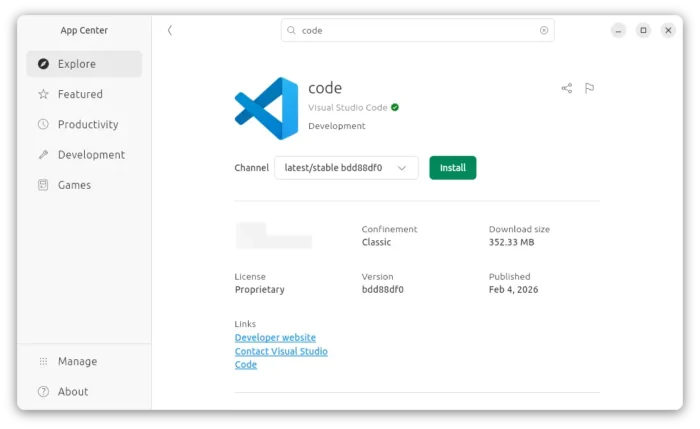
Ubuntu users can either simply search & install the Snap package from App Center (or Ubuntu Software for 22.04), or download and install the deb package from the link above.

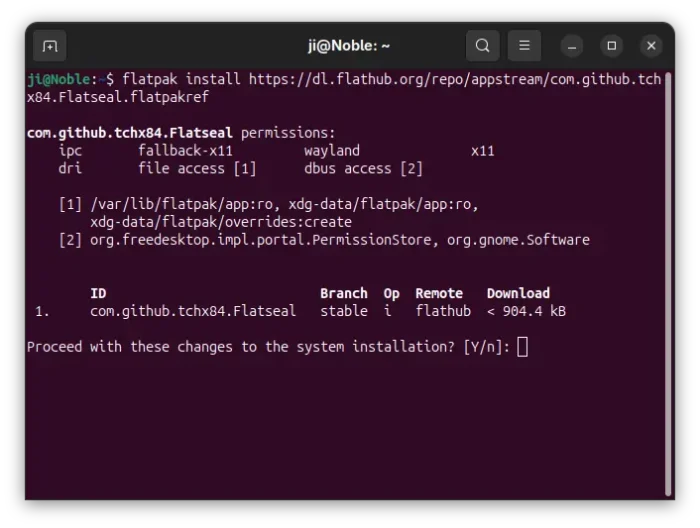
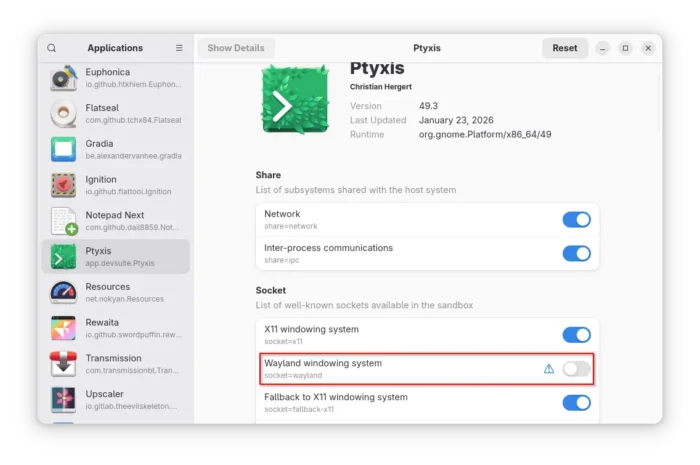
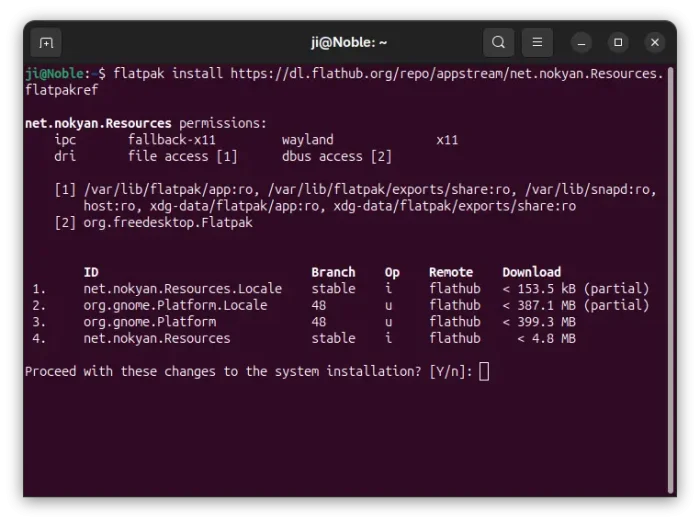
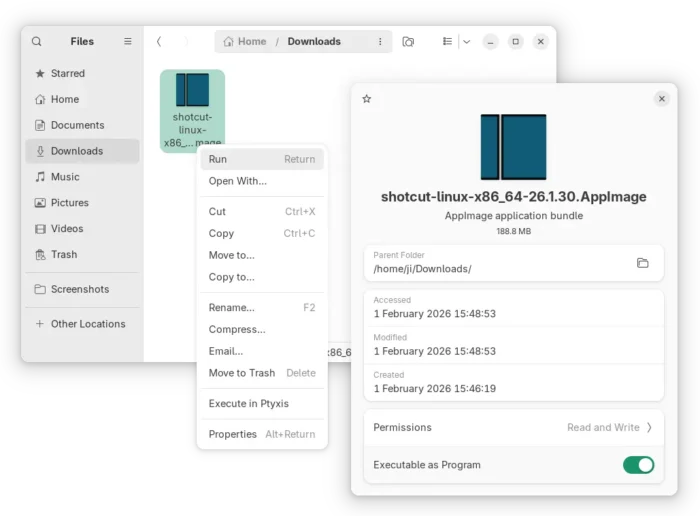
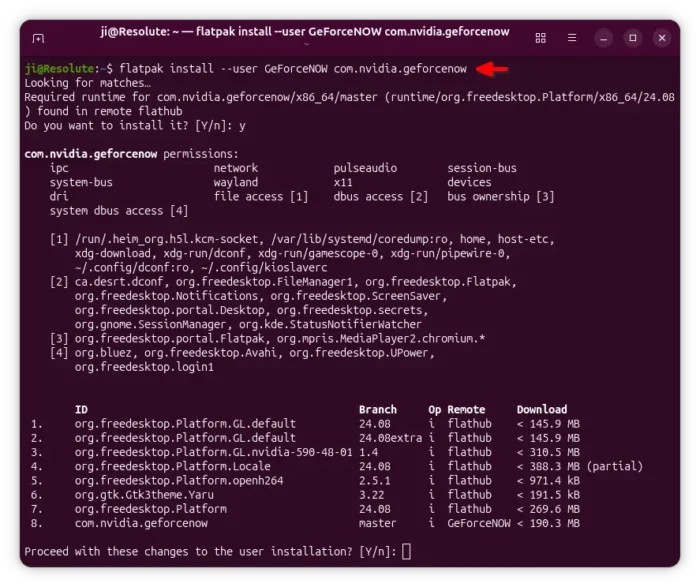
And, a community maintained flatpak package is available for choice with most Linux support. See this guide for how to install them step by step.

  •  

GCompris 26.0 Released with 2 New Activities & Teachers Tool

GCompris, KDE’s educational software suite, released new 26.0 version few days ago.

The new version introduced official companion tool for teachers, added two new activities, and fixed various bugs.

For those who don’t know about the software, it’s a free open-source educational software for children aged 2 to 10, which works on Linux, Windows, BSD, macOS, and Android.

It includes 190+ activities, some of them are game orientated but nonetheless still educational, providing training exercises within and outside the classroom.

With the new 26.0 version, the official teachers tool is introduced. It allows teachers to create and manage pupils groups, create specific work plans, connect and send a work plan to pupils, visualize the work results per group and pupil, and analyse pupils answers.

The GCompris-teachers app is so far only available for Linux and Windows, and teachers should use the same version of the main GCompris application.

Gcompris teachers app

The new version also introduced two new activities. They include “Drawing wheels”, an activity to make beautiful drawings by rolling the gear in the cogwheel.

Pupils can choose wheel size, gear size, pen settings and color, and finally click play to roll the gear to start drawing. An eye icon is available to hide the gear and the cogwheel to view the final drawing. And, it supports saving image as SVG along with PNG, and load again (SVG only) from the activity.

Another one is “Multiple choice questions“, a MCQ activity that’s hidden by default. It’s only visible after teacher created the questions and sent to clients. Pupils need to click an answer to select then press OK to answer the questions sent by teacher. After validating, a feedback text (if set by teacher) panel will be displayed, and click anywhere will close it.

Other changes include two new Kannada and Tamil languages support, as well as bug-fixes and improvements. See the NEWs page for details.

How to Get GCompris 26.0

The software provides official installer packages for Linux, Windows, macOS, Android, and Raspberry Pi, which are available to download in its website:

For Linux, either download the .sh installer and follow the guide in the link above, or select install the Flatpak package or Snap package (from App Center).

  •  

Darktable 5.4.1 Released with Few Dozen Fixes [Ubuntu PPA Updated]

Darktable, the free open-source photography app and raw developer, released new 5.4.1 version one day ago.

This is a minor release that focuses on bug-fixes, stability improvements, as well as camera support changes and translation updates, but no new features.

First, the new version fixed possible crashes in the situations, when mounting a camera from Darktable due to the current locale, when using workspace due to the non deterministic ordering of the list of workspace read on disk, and when parsing highlight-preservation Exif tag while loading some Olympus ORF files.

It also fixed wrong handling of scaling factor during multi-preset export, wrong handling of overwrite if changed in export, and wrong RAW specific auto-applied preset being applied to non RAW images.

There are as well fixes for subtle color casts in bayer dual demosaicers, mask support in scale pixels module, and possibly outdated metadata when returning from darkroom.

Besides bug-fixes, the new version also updated Lua API to v9.6.0, added noise profiles for Canon EOS 10D and Sony ILCE-7CR.

Image by Chanzj from Pixabay

It however suspended support for Creo/Leaf Aptus 22(LF3779)/Hasselblad H1, Fujifilm IS-1, Kodak EasyShare Z980, Leaf Aptus-II 5(LI300059)/Mamiya 645 AFD, Leaf Credo 60/80, Olympus SP320, Phase One IQ250, and ST Micro STV680.

And, it misses compression mode support for Apple ProRAW DNGs, CinemaDNG lossless (Blackmagic, some DJI, etc.) and lossy (Blackmagic), DNG 1.7 using JPEG XL (Adobe enhanced, Samsung Expert RAW), Fujifilm lossy RAFs, Nikon high efficiency NEFs, Phase One other than IIQ L, and Sony ARW 4.0/5.0 downsized lossless and ARW 6.0 lossy.

How to Install Darktable 5.4.1

The official release note as well as the installers for Linux, Windows, macOS, and source tarball are available in Github via the link below:

Linux user may select download the AppImage, then add executable permission and run to launch the software.

There are as well Snap package available in Ubuntu Software (or App Center), and Flatpak package that works in most Linux. Though both of them are not updated at the moment of writing.

For those who prefer the native package formats, the official .deb/.rpm packages for Debian, Ubuntu, Fedora, and openSUSE are available to download at this page.

And, for Ubuntu users who prefer Ubuntu PPA, I’ve built the 5.4.1 version into this unofficial PPA for Ubuntu 22.04, Ubuntu 24.04, and Ubuntu 25.10.

Simply open terminal (Ctrl+Alt+T) and run the 3 commands below one by one to add PPA, refresh cache and install the deb package:

sudo add-apt-repository ppa:ubuntuhandbook1/darktable
sudo apt update
sudo apt install darktable
  •  

Krita Released 6.0 Beta with Qt6 Port & Native Wayland Support

Krita, KDE’s digital painting software, released the first Beta of the next major 6.0 and 5.3 versions yesterday.

The 2 versions were released in parallel. Krita 6 and 5.3 share all the same features, except, that 5.3 is built on top of Qt5, while 6.0 features Qt6 port and native Linux Wayland support.

Thanks to Wayland support, in particular Wayland Color Management protocol, the 6.0 Beta brings HDR support for Linux as well as fractional scaling and 10 bit display support.

Besides the Qt framework change and Wayland support, the new version also completely overhauled the Text tool. Instead of opening the edit text dialog, it finally supports on-canvas edit just like other image editors do.

It as well supports wrapped text, text in shape, text on path, and text Properties docker, allowing to configure text font family, style, font size, align, as well as few dozens other properties.

In addition to Text Properties docker, the Text tool also features glyph palette to select alternate glyphs that may be present in the currently used font, and new Type Setting Mode that provides controls to edit Font Size, Baseline Shift, Line Height and Dominant Baseline directly on canvas.

The new version as well introduced a new knife tool (Comic Panel Editing tool) for vector objects, allowing to cut through a shape with a gap width.

So far there are 3 gap widths to choose from, and it supports removing a gap (merge shapes). And, it will probably support custom gap width, snap, move the gutter etc functionalities in future releases.

Knife Tool

The Beta of Krita 5.3 and 6.0 added loading and saving support for Radiance RGB, the old but fairly widely used HDR image format.

It also added support multi-layered and multi-pages and animated JXL files, new Bundle Creator, as well as loading and saving shapes, vector masks and guides fro PSD.

Other changes include:

  • Add Fast Color Overlay filter.
  • Add Propagate Colors filter.
  • CSS palette support.
  • Multibrush ‘Copy Translate at Intervals’ mode.
  • Add Python Painting API.
  • Ability to add dockers to the pop-up palette.
  • Real-time capturing support for the recording docker plugin.
  • Refactor blendmodes to properly support HDR modes.
  • Transform shortcuts support for multi-selected layers.
  • Rotate the transform bounding box with ctrl+alt.

For more about the new versions, see the official release note.

Get Krita 5.3/6.0 Beta

The source tarballs, as well as the official packages for Linux, Windows, macOS, and Android are available to download in KDE website via the link below:

For Linux on Intel/AMD platform, select download the .AppImage, then add executable permission and run the launch the image editor.

Tips: Ubuntu since 22.04 needs to install libfuse2 for AppImage support by running the command below in terminal (Ctrl+Alt+T):

sudo apt install libfuse2

  •  

LibreOffice 26.2 Released with Markdown Import/Export, Vertical Tabs

LibreOffice, the free open-source office suite that defaults in many Linux Distributions, released new major 26.2 version yesterday.

The new version updates it UI with vertical tabs in left side for the dialogues. While user can easily switch back to use tabs on top, by going to Tools -> Options -> LibreOffce -> Appearance setting page.

The layouts panel in the Impress sidebar, theme dialog, and Presets and Shadow Style Positions from the border page dialog now use modern native IconView GTK widget for improved UI consistency and performance. And, in Linux it uses native GTK or Qt color chooser dialog instead of the custom LibreOffice one, though also user can switch back by going to General settings.

Besides UI changes, the new version added support for importing/exporting Markdown format, as well as using ODT/DOCX templates while importing a Markdown document.

It also sped up EPUB export and added a progress bar during the export process. And, it improved line height handling of Chinese, Japanese, and Korean DOC/DOCX documents.

For fonts with license restrictions, it does no longer silently ignore but asks user if open the document in edit mode or in read-only mode.

The Writer app now supports Start and End paragraph alignment, automatically set the direction of RTL text while typing, and includes new option to prevent dragging of selected text.

It as well displays a more visible grid, and the Snap to Grid functionality now accurately aligns objects with the grid.

The Calc features xmlMaps.xml, Biff12 (Excel 2007+) clipboard format, and connector support. Excel 2010+ is now the default format when saving as XLSX. There are as well performance and sort dialog options improvements.

Other changes include:

  • Introduced Microsoft Media Foundation APIs on Windows to support video and audio playback of common codecs.
  • Allow inserting hyperlink via context menu.
  • New symbols for unordered lists.
  • Generic XML and JSON mapping to Calc.

For more, see the official release note.

How to Install LibreOffice 26.2

LibreOffice provides official installers which are available to download via the link below:

Linux user may choose the native deb for Debian/Ubuntu based distributions, rpm for RHEL/Fedora, or Snap package that’s available in Ubuntu Software (App Center), Flatpak package runs in sandbox, or non-installable AppImage.

For Ubuntu users who want to upgrade the pre-installed one to the latest 26.2 version, then it’s recommended to wait the update from LibreOffice Fresh PPA.

  •  

Ubuntu 24.04 Has Linux 6.17 HWE Kernel Backported

For Ubuntu 24.04 LTS, the Linux Kernel 6.17 backported from Ubuntu 25.10 is available ahead of the 4th point release (Ubuntu 24.04.4).

As you may know, every Ubuntu LTS point release (except for the first one) has a hardware enablement (HWE) kernel major version update, that is the backport of the latest supported release, until the next LTS.

Ubuntu 24.04.2 has Kernel 6.11 from 24.10, Ubuntu 24.04.3 features Kernel 6.14 from 25.04, and now Kernel 6.17 from 25.10 is available before the release of Ubuntu 24.04.4 due in this month.

Different to the Mainline Kernel PPA and any third-party Kernel packages, the HWE kernel is signed with secure boot support, NVIDIA proprietary driver compatibility, and Ubuntu specific drivers. And, it’s officially supported by Canonical (the company behind Ubuntu).

New features from Kernel 6.14 to 6.17

Compare to the last Kernel 6.14, there are numerous new features and new hardware support in Kernel 6.15, 6.16, and 6.17.

For AMD, it includes virtual TPM driver to emulate a hardware TPM 2.0 chip for virtual machines (VMs) or containers, RX 9070 series fan speed report, OEM i2c support for RGB lighting controls, AMD Versal NET SoC support, temperature monitoring support for Zen 5 desktop CPUs, and better support for processors with mix of classic and dense cores.

On Intel side, it features Advanced Performance Extensions (APX) support, Xe driver update with virtual memory share, TDX support in KVM to create hardware-isolated virtual machines, audio support for Intel Wildcat Lake, fan speed report with Intel Xe driver, web camera support on Lunar Lake and Panther Lake laptops, and OpenGL and Vulkan support enabled for Xe3 Panther Lake graphics.

There are as well many new and updated hardware support. They include the support for Apple Touch Bar display, Apple Magic Mouse 2 USB-C, Apple M2 Pro / Max / Ultra PCIe, Touch Bars on x86 MacBook Pros, and new driver for being able to reboot modern M1/M2 Macs.

It also includes support for MNT Reform 2, Samsung Snapdragon X, ASUS Zenbook A14 and HP EliteBook Ultra G1q laptops, hardware monitoring and fan control on compatible Alienware laptops, external DisPlayPort support in ThinkPad T14s and XPS 13 9345, and USB-A ports, micro-SD card reader, Bluetooth connectivity for ASUS Vivobook S15.

Other hardware support include:

  • NVIDIA Tegra264.
  • NVIDIA Blackwell and Hopper GPUs support via Nouveau driver.
  • Intel Killer E5000, Realtek RTL8814AE and RTL8814AU, Realtek RTL8127A 10GbE Ethernet support.
  • Huawei Matebook E Go EC tablet.
  • Raspberry Pi RP1 PCI device.
  • Lenovo Legion Go S gaming handheld.
  • BCM5325 switches.
  • MediaTek MT8370 SoC.
  • Better support for Sony PlayStation 5 controllers.
  • Lenovo ThinkEdge SE30 Watchdog support.

For more details, see 6.15, 6.16, 6.17 in kernelnewbies.org.

Install the New HWE Kernel 6.17

To get the new kernel, simply launch Software Updater then install all the available updates.

Or, launch terminal (Ctrl+Alt+T) and run the command below instead:

sudo apt update && sudo apt full-upgrade

Finally, restart computer to apply change.

For original 24.04 users who never installed the HWE kernel, try running the command below to get it:

sudo apt install linux-generic-hwe-24.04

And, in case the new kernel does not work properly on your machine, run the command below to install back the 6.14 kernel, then boot it from Grub boot-loader -> Advanced options sub menu.

sudo apt install linux-image-generic-6.14 linux-headers-generic-6.14
  •  

“Fix” Giant Cursor Issue for Flatpak Apps in Ubuntu 24.04 | 22.04

For Ubuntu 24.04 and Ubuntu 22.04 LTS with default GNOME desktop, here’s a quick fix for unusual cursor issue in some Flatpak app windows.

This is Gnome upstream bug which has been fixed, but not backported for current Ubuntu LTS releases with old Gnome desktop environments.

Why the issue?

The giant mouse cursor issue for Flatpak apps using GNOME runtime was reported 7 months ago, which has been fixed in GNOME 48 by implemented wp_viewport support for cursor surfaces.

The fix has also been backported for GNOME 47.4, but NOT for GNOME 46 and earlier as they reached end of life. GNOME developer explained:

To clarify. This has been fixed in GNOME 47.4 and newer. Specifically its this Mutter Merge Request mutter!3859 (merged) and couple GTK fixes which you will be getting from the Flatpak runtime anyway.

There is nothing that we can do about it if a distribution chooses to ship an outdated version of GNOME. I would suggest you open issues against your distribution to fix/backport this on their end…

The Ubuntu side however cannot backport the wp_viewporter fixes for 24.04 (with Gnome/Muter 46), because it’s too large and has the potential to regress the LTS. The Ubuntu developer said:

I don’t think we can backport the wp_viewporter fixes to mutter 46, it’s too large: it took many iterations during the GNOME 48 cycle upstream to get it working correctly, and we’d risk regressing noble.

How to “Fix” (Workaround) the Flatpak cursor issue

The issue so far happens only on Ubuntu 24.04 and Ubuntu 22.04 with default GNOME when running Flatpak apps that use GNOME 49 run-time in sandbox.

Add icon theme permission access (~/.icons and /usr/share/icons) does not work in my case, while only disable Wayland windowing system (for Flatpak apps only) works.

NOTE: switch off Wayland might cause few performance loss and security issues.

1. To do so, first open terminal (Ctrl+Alt+T) and run command to install Flatseal app, the graphical tool to manage Flatpak permissions.

flatpak install https://dl.flathub.org/repo/appstream/com.github.tchx84.Flatseal.flatpakref

2.Then, launch Flatseal. Choose the Flatpak apps that have unusual cursor issue, and then turn off “Wayland windowing system” option under Socket session.

Finally, re-launch the Flatpak apps to apply changes.

For those who don’t want to install one more app for the job, run the commands below instead one by one:

  • First, run command to list Flatpak apps, and copy the target App ID:
    flatpak list --app
  • Then, run the command below (replace app.devsuite.Ptyxis with yours App ID) to disable Wayland:
    sudo flatpak override --nosocket=wayland --socket=x11 app.devsuite.Ptyxis

  •  

SuperTux 0.7.0 Beta 2 Released with Editor & Gaming Improvements

SuperTux, the classic 2D jump and run game, released the second Beta of version 0.7.0 yesterday.

SuperTux 0.7.0 is the next major release of this free open-source Super Mario inspired game. The Beta 1 was released a month ago as the first development version for testing.

It introduced many exciting new features, include completely overhauled world map, redesigned character Tux, multiple player mode, new creep forward, new enemies and NPCs, Linux Flatpak package, revived Android support, and many other changes.

The second Beta does not include so much exciting new features, but focuses on bug-fixes, editor improvements, and other minor new features.

The Level Editor now always start in tile mode. Additional to arrow keys, it now supports using WASD keyboard keys to scrolling, and Ctrl+H to show or hide triggers.

The editor now highlights the current tool in toolbox, updates toolbar when switching to tile/object from menu, and does no longer refresh layers after any change.

It also implemented new node circle graphics, made EditorComment a draggable, added open editor workaround for macOS, and fixed various bugs.

Besides improvements to the level editor, the new Beta improved multiplayer option by replacing “Add player” option with “Add player (keyboard)” and “Add player (controller)”.

It as well added floating Tux Dolls, deeply rooted song from Servalot, and re-added world select backgrounds in worldmaps..

The oldbomb fuse time changed from 5s to 2s. Goldbomb does no longer drop coins when not glinted. And, Bullets can now bounce on slopes, and moves faster than Tux in water.

Other changes include:

  • Option to allow ignoring the hardcoded player limit.
  • Ctrl+Alt+g to toggle ghost mode.
  • Allow building without networking support.
  • Enable OpenGL support for Flatpak package.
  • And many bug-fixes and other changes.

How to Get SuperTux 0.7.0 Beta 2

For more about the new Beta, as well as the official installers (under Assets section), go to the Github release page via the link below:

Linux user on AMD/Intel platform may select download the AppImage package, add executable permission, and run to launch the game.

As the package name says, it requires glibc >= 2.38. For Ubuntu, it means you need 24.04 LTS and higher, and make sure the libfuse2 library is installed via the command below in terminal (Ctrl+Alt+T):

sudo apt install libfuse2

For choice, select download the Flatpak package, then run command below in terminal (Ctrl+Alt+T) to install:

flatpak install drag-and-drop-flatpak-package-into-terminal


Tips: run sudo apt install flatpak to install the daemon if your don’t have Flatpak support in Ubuntu.

If the app icon is not visible, either log out and back in to apply path environment change, or run the command below instead to start it from terminal:

flatpak run org.supertux.SuperTuxNightly

(Optionally) To uninstall the package, use command:

flatpak uninstall --delete-data org.supertux.SuperTuxNightly
  •  

Resources 1.10.0 Released with Monitoring Support for AMD NPU

Resources, the system resources and processes monitor that’s default in Ubuntu 26.04, released new 1.10.0 version yesterday.

The new version of this free open-source Rust written application added support for monitoring AMD NPU, the neural processing unit for accelerate AI and machine learning tasks, that found in Ryzen AI 300 / 400 series, Ryzen 7 8700G, Ryzen 5 8600G, and Ryzen 7040/8040 series processors.

Resources has initial NPU support since version 1.7.0 which was for Intel processors only. With the new release, AMD NPU is also supported through the amdxdna driver. Meaning user needs Linux Kernel 6.14 (default in Ubuntu 24.04 with HWE Kernel) or higher for the out-of-the-box support for Ryzen AI NPUs.

You may try modinfo amdxdna command to see if the driver is present in your kernel, and use lsmod | grep amdxdna to see if it’s loaded.

And, load the kernel module either by running sudo modprobe amdxdna command that works until reboot, or by adding to a config file under /etc/modules-load.d/ that works on startup.

Beside AMD NPU, the new version also added support for searching multiple process names using “|” operator. Which is useful when you need to apply operations on multiple processes that are associated.

It also added support for detecting AppImage apps managed by appimaged, which has been deprecated in favor of Go AppImage, as well as detecting apps managed by Portable sandbox and LXC bridge network interfaces for containers.

The new version also changed the way it reads per-process memory usage. Previously, it subtracts shared memory from the memory usage of a process. Now, it reads VmRSS value reported in /proc/<pid>status represents the total amount of physical memory, including the shared memory. So, the app now reports higher per-process memory usage compare to Gnome System Monitor.

Other changes include:

  • Significantly reduce the CPU usage of Resources’ companion process.
  • Improve keyboard navigation for Apps view and Processes view.
  • Fix that column names were not announced to screen readers.
  • And some other fixes and changes.

How to Install Resources

Ubuntu 26.04 (dev release so far) ships with Resources 1.91.0 by default, though not sure if it will upgrade to the new 1.10.0 version in the final release.

For most Linux distributions, the app provides official Flatpak package that runs in sandbox for both modern Intel/AMD and ARM64 (e.g., RasPi and Snapdragon X) processors.

Linux Mint and Fedora (with 3rd party repository enabled) can simply search & install the package from either Software Manager or GNOME Software.

While Debian, Ubuntu, and other Linux may do the steps below one by one to install the package:

  • First, open terminal (Ctrl+Alt+T) and run command to install the Flatpak daemon package:
    sudo apt install flatpak

    For other Linux, follow the official setup guide to enable Flatpak support.

  • Then, run the command below to install the system monitor and task manager app:
    flatpak install https://dl.flathub.org/repo/appstream/net.nokyan.Resources.flatpakref

  • To update the app package, use command:
    flatpak update net.nokyan.Resources

Tips: if the app icon is not visible, try log out and back in, or run last command but replace update with run to start it from terminal.

Uninstall:

To uninstall the Flatpak package, run the command below in terminal:

flatpak uninstall --delete-data net.nokyan.Resources

Also run flatpak uninstall --unused to remove useless runtimes.

  •  

Linux Lite 7.8 Released as New Lightweight & Ubuntu 24.04 Based Distro

Linux Lite, the lightweight and beginner friendly Linux distribution, released new 7.8 version yesterday.

The new Linux Lite 7.8 is still powered by Kernel 6.8.0 and Ubuntu 24.04 package base, and features XFCE 4.18 desktop with customized layout and themes for better look and feel while keeping lightweight.

The release completely re-wrote its core applications, porting to Python and GTK4. They include:

  • Lite Auto Login
  • Lite Desktop
  • Lite DPI
  • Lite Firewall
  • Lite Network Shares
  • Lite Software
  • Lite Sounds
  • Lite Sources
  • Lite System Report
  • Lite Theme Manager
  • Lite Updates
  • Lite User Manager
  • Lite Welcome

Lite Software has been updated with 20 more popular applications support. They include BleachBit, Darktable, KDE Connect, Kdenlive, Stacer, and more. While, advanced users may use apt command to install more other apps.

It also updated the System tab of System Monitoring Center to display more information about the system. It now shows the OS name version, Kernel version, system uptime, basic computer specs, local and internet IP, and some about the desktop and packages.

For daily computing needs, there are as well Google Chrome 144.0, Thunderbird email client 140.7, LibreOffice 25.8.4, VLC media player 3.0.20, and GIMP image editor 2.10.36. And, for computers that’re not well supported with default Kernel 6.8.0, custom kernels from version 3.13 – 6.18 are available in the system repositories.

For more about Linux Lite 7.8, see the release note from its website.

Get Linux Lite 7.8:

Linux Lite only supports computers and laptops with modern 64-bit Intel/AMD CPU processors.

The computer specs requirement include 1.5GHz dual-core processor, 4GB RAM, 40GB disk space, and 1366×768 resolution.

It as well needs DVD drive or USB port for booting the ISO image, and Secure Boot needs to be disabled for installing the distro, though it can be enabled afterward. And, in my case, it plays very smooth in virtual machine with i5-8350U (3 cores) and 2GB RAM.

To download Lite Lite .iso image, go to link below:

  •  

Shotcut 26.1 Released with Hardware Decoder for Export & Preview

After few weeks of Beta testing, Shotcut video editor announced version 26.1 today.

The new version of this free open-source Qt and MLT based video editor finally introduced hardware decoding support for more workflows.

Preview Scaling, the feature that lowers the resolution of video shown in the preview monitor, now has hardware decoding support.

The feature is enabled by default, except for Linux users with NVIDIA graphics card. It uses VA-API on Linux, Media Foundation on Windows, and Video Toolbox on macOS to offload CPU tasks to GPU, which can improve battery life and keep your computer cooler.

However, it does not have a significant speed boost according to the release note (unless using Linear 10-bit CPU processing mode). And, it does not seem to help much with seeking and scrubbing as proxies are still the key for that.

Besides preview scaling, the export process has also features hardware decoding support.

Export video is often known as the process of rendering or encoding. But video editor usually needs to decode the original video clips and changes you made (filters and cuts) before re-encoding.

By enabling hardware decoder for export, it also reduces CPU usage but it can sometimes increase the export time (according to release note but don’t know why), so the feature is disabled by default.

Other features in the release include Blend Mode, a filter that can override the way a clip blends with the the bottom video track, and track option for the Linear 10-bit GPU/CPU processing mode. And, it increased the maximum resolution in Video Mode and Export to 8640 for 8K VR180 video.

Other changes include:

  • Ability to convert projects between GPU and CPU processing modes.
  • Add Chinese (Simplified) translation.
  • Add back Screen Recording option on Linux and macOS.
  • Changed “Timeline > Add Generator” and “New Generator > Add To Timeline” to not seek.
  • Change bulk proxy generation to update clips.
  • And more!

How to install Shotcut 26.1

The official release note, and installer packages for Linux, Windows, macOS, as well as the source tarball are available in the link below:

For Linux, either select download the AppImage package from the link above, add executable permission, finally click run to launch the video editor.

Tips: Ubuntu 22.04+ needs to run sudo apt install libfuse2 to install the required library first.

Or, Ubuntu may simply launch App Center (or Ubuntu Software), then search & install the Snap package:

While both the packages above supports only AMD/Intel, there’s also an official Flatpak package that works on both amd64 and arm64 (RasPi, SnapdragonX) platforms.

  •  

Ubuntu 26.04 Snapshot 3 is Available to Download

Ubuntu 26.04 Snapshot 3, the third monthly development release for the next LTS, is out!

The developer team announced this version last night:

I’d like to announce the third successful publication of the monthly snapshot – Resolute Snapshot 3 (but also the first of 2026!). You can find the images on cdimage.ubuntu.com, for instance …

The new snapshot so far features Kernel 6.18 and GNOME 49, though the final release will have GNOME 50 and most probably Kernel 7.0.

The new showtime video player has been made into system repository, and resources system monitor and task manager is pre-installed when installing Ubuntu with “extended selection”.

Software & Updates, the built-in tool for managing software sources, drivers, and Ubuntu Pro has been ported to GTK4, with a modern UI that’s well integrated with recent Gnome desktop environment.

Though, according to the road-map, the 26.04 release will begin to deprecate this tool, instead merging the features into App Center and Security Center.

The LTS will also improve the NVIDIA on Wayland experience, introduce Security Protocol and Data Model (SPDM) based fingerprint authentication, add more control for TPM-backed full disk encryption (e.g., ability to add/remove PIN or passphrase after installation, re-encrypt a disk via Security Center), and Ubuntu Pro support on WSL.

See this on-going release note page for more details.

Get Ubuntu 26.04 Snapshot 3

The next snapshot will be available on February 26, while the final release is planned for April 23, 2026.

For the current snapshot, you may select download the .iso images for Desktop and Server, as well as Netboot tarball, WSL, and pre-install server images via the link below:

For other desktops and education purpose, the snapshot also includes the .iso images for all the official flavors, which are available to download via the link below:

For Ubuntu MATE and Unity, the iso images are automated builds without maintainers behind them.

If you’ve already run your machine with Ubuntu 26.04 daily build or snapshot 1/2, then simply install all the available updates to get to the new snapshot.

For current Ubuntu 25.10, I’ve tried to upgrade to the new 26.04 Development release by first installing all updates:

sudo apt update && sudo apt full-upgrade

Restart if required, then run:

do-release-upgrade -d

For future releases, see the table below or the official release schedule.

February 26, 2026 Snapshot 4
March 26, 2026 Beta (mandatory)
April 16, 2026 Final Freeze, Release Candidate
April 23, 2026 Final Release
  •  

Manually Install/Remove NVIDIA GeForce Now in Linux via Flatpak

NVIDIA GeForce Now added official Linux support yesterday via Flatpak package! Here’s the step by step guide shows you how to manually install or remove it in Ubuntu and other Linux.

GeForce Now is NVIDIA’s cloud gaming service streams high-end PC games to laptops, phones, and TVs, allowing for better gaming experience without requiring high-end hardware.

GeForce Now in Ubuntu

The support for Linux (so far beta) requires Ubuntu 24.04 LTS, Xorg for NVIDIA GPUs and Wayland for AMD/Intel GPUs. However, as the installer is an universal Flatpak package, it can be installed in most Linux Distributions!

Besides system requirement, it also requires dual-core Intel/AMD CPU, 4 GB memory, and a GPU with H.264 and H.265 (HEVC) video codecs support, as well as 580.126.07+ driver for NVIDIA GPUs and Mesa 24.2.8+ for Intel/AMD GPUs.

And, it requires 25 Mbps internet connection for 60 FPS gaming performance on 1920×1080 screen resolution, or 45 Mbps for 4K resolutions (3840×2160) at 120 FPS. See this page for more about the Linux OS requirements.

By default, you may download the installer from NVIDIA website. Then, add executable permission from file properties dialog, and finally click Run to start installing it.

While, below will show you how to add the remote repository and install the Flatpak package manually.

Install GeForce Now Flatpak Package

1. For Debian and Ubuntu based distributions, first open terminal (Ctrl+Alt+T) and run command to install Flatpak daemon:

sudo apt install flatpak

Other Linux may follow the official setup guide to enable Flatpak support.

2. Next, run command to add the GeForceNOW remote repository:

flatpak remote-add --user --if-not-exists GeForceNOW https://international.download.nvidia.com/GFNLinux/flatpak/geforcenow.flatpakrepo

In my case, I also need to add the Flathub repository for runtime dependencies:

flatpak remote-add --user --if-not-exists flathub https://dl.flathub.org/repo/flathub.flatpakrepo

If you want to install GeForce Now for all users in your Linux Distribution, then skip --user in the both commands above.

3. After added the flatpak repositories, finally run the command below to install the package:

flatpak install --user GeForceNOW com.nvidia.geforcenow

Also, skip --user option if you added the repositories without it.

After installed the package, search for and install it from either start menu or Gnome overview depends on your desktop environment (Log out and back in if app icon is not visible).

And, run the command below regularly to check updates:

flatpak update com.nvidia.geforcenow

Uninstall GeForce Now

To uninstall the package, open terminal (Ctrl+Alt+T) and run command:

flatpak uninstall --delete-data com.nvidia.geforcenow

Here, skip --delete-data if you want to keep the personal app data which is stored in .var/app/ directory.

Then, remove the remote repository by running command:

flatpak remote-delete GeForceNOW

Finally run flatpak uninstall --unused to remove useless run-times.

  •  

NVIDIA VA-API Driver Released 0.0.15 with Few VP8 Improvements

NVIDIA VA-API Driver, the VA-API implementation that uses NVDEC as backend, released new 0.0.15 version yesterday.

For those who don’t know about it, it’s a free open-source API for NVIDIA users to enable hardware accelerated video decoding support when using Firefox web browser.

As you may know, Firefox so for only supports VA-API for hardware accelerated video decoding on Linux. It’s supported by Intel and AMD GPUs, but NOT for NVIDIA with the proprietary driver. So, nvidia-vaapi-driver was born as a wrapper to do the job.

The driver has decoding support (NO encoding) for AV1, H.264, HEVC, VP8/VP9, MPEG-2, VC-1 video codecs. It’s designed for Firefox, though may also works in other apps, such as MPV, which is useful for testing purpose as Firefox needs to be tweaked for hardware decoding support.

Firefox’s RDD process that isolates media decoding from the main process

The driver does not support Firefox sandboxing feature that isolates web content from the operating system. It by default detects if the sandbox enabled for RDD process that the decoder runs in, then choose whether to continue or not.

By releasing version 0.0.15, this sandbox check now only applies to Linux, so disabled for FreeBSD because it does not support Firefox sandboxing, and deprecated /proc (unmounted by default).

Besides skipping sandbox check in FreeBSD, the new version also improved VP8 codec support by fixed null slice headers, which may cause green corruption issue when decoding some VP8 video content with this driver.

How to Install NVIDIA VA-API Driver 0.0.15

NVIDIA VA-API Driver has been made into many Linux distributions’ repositories. For Ubuntu since 24.04, it’s available in the universe repository though a bit old.

For the more recent 0.0.15, I’ve built it into this unofficial PPA for Ubuntu 22.04, Ubuntu 24.04, and Ubuntu 25.10 users.

To install it, open terminal (Ctrl+Alt+T) and run the commands below one by one:

sudo add-apt-repository ppa:ubuntuhandbook1/nvidia-vaapi
sudo apt update
sudo apt install nvidia-vaapi-driver

For how to set up and make it work for Firefox, see either the official README or this step by step guide for Ubuntu.

  •  

Transmission 4.1.0 is out with Sequential Download & IPv6 [Ubuntu PPA]

Transmission Bittorrent client finally released new major 4.1.0 version yesterday! Here are the new features and Ubuntu PPA for Ubuntu 22.04, Ubuntu 24.04 and 25.10.

The new version is made available after more than a year of development. It fixed the significantly degraded transfer performance in 4.0.x series by changed the uTP ack scheduling algorithm. And, the developer claimed that the download speed in his case went up from 70 MB/s to 90 MB/s.

The new version also added IPv6 Local Peer Discovery support, as well as dual-stack UDP trackers for the simultaneous use of both IPv4 and IPv6 addresses. And, it added back support for old BEP-7 query parameters with &ipv4= and &ipv6=.

The CLI client now has a new -sel / --sequential-download command option, allowing to download pieces sequentially. It’s useful for those who want to watch a video during the download process.

The feature however does not support the GUI and Web UI so far, and, it only works in command line for either transmission-cli or transmission-remote by running similar command below:

transmission-cli -seq ~/Downloads/xxx.torrent

Transmission 4.1.0 also added an option to verify a torrent immediately after it finishes downloading. Don’t know if I missed something, but I can’t find out this option in Ubuntu while the merge request provides only a screenshot for macOS.

The settings.json file (under .config/transmission for Linux) added new preferred_transport allowing to choose between TCP and UDP when initializing outgoing connections. It as well added new sleep-per-seconds-during-verify option, disable the disk write cache when settings "cache-size-mb": 0, and fixed the bug that alt-speed-enabled had no effect.

Transmission Config file

The GTK UI has been updated with native file chooser dialogs, and ability to set default behavior for GTK dialogs to add torrent from url and add tracker. The QT UI now features native icons for menus and toolbars depends on the operating system, ETA to compact view, and labels feature from web-UI.

And, Web UI now supports drag’n’drop adding torrents, high contrast theme, long press on touchscreen to open context menu, percent digits in process bar, UI improvements and many fixes.

Other changes in Transmission 4.1.0 include:

  • new JSON-RPC 2.0-compliant RPC API, co-exists with the existing RPC API for remote control.
  • Add “Show Toolbar” toggle, and option to set default for macOS.
  • Add option to prevent idle system sleep, and Low Power Mode support for macOS.
  • Add start with all torrents paused support to settings file and daemon.
  • Improve code to use less CPU and Memory.

There are as well tons of other improvements and bug-fixes. See the Github release page for details.

How to Install Transmission 4.1.0 in Ubuntu

Transmission provides official installers for Windows and macOS, along with source tarball, they are available to download via the link below:

As the default Bittorrent client, Ubuntu 26.04 will probably include the new Transmission 4.1.0 in system repository and pre-install it if you select “Extended selection” mode when installing Ubuntu desktop.

And, for current Ubuntu 22.04, Ubuntu 24.04, and Ubuntu 25.10, I’ve built the new release package (.deb) into this unofficial PPA.

To add the PPA and install Transmission 4.1.0, open terminal (Ctrl+Alt+T) and run commands below one by one:

sudo add-apt-repository ppa:ubuntuhandbook1/transmission
sudo apt update
sudo apt install transmission

Optionally, install transmission-cli for command line use, or transmission-daemon for running in background for server use.

For choice, there are also community maintained snap package (available in App Center) and Flatpak package that work in most Linux, though both are not updated at the moment of writing.

Uninstall

To remove the PPA and restore transmission to the stock version, run the command below to install ppa-purge and use it to purge the PPA:

sudo apt install ppa-purge && sudo ppa-purge ppa:ubuntuhandbook1/transmission

Or, manually remove the PPA:

sudo add-apt-repository --remove ppa:ubuntuhandbook1/transmission

And, remove the torrent client via command:

sudo apt remove --auto-remove transmission transmission-common
  •  

The Second Beta of Plasma 6.6 Released with Numerous Bug-fixes

After almost of 2 weeks beta-1 testing, the second beta of KDE Plasma 6.6 is out before the final release planned for 17th February 2026.

Plasma 6.6 Beta 2 contains mostly bug-fixes, stability and user experience improvements, along with few minor new features.

First, for those who missed the first Beta, it introduced new feature to save current user settings (e.g., colors, window decoration, icons, cursors, desktop and window layout) as a custom global theme with user defined name and thumbnail image.

It also replaced the classic SDDM display manager with new plasma-login-manager, introduced new plasma-keyboard as a replacement for the Maliit virtual keyboard, and added OCR support for the built-in screenshot tool.

There are as well “Hide from Screencast” window header context menu option, “Tiled” wallpaper type, automatic screen brightness adjustment, three finger pinch gesture, global Shortcuts for seeking forward and backward, and more!

Compare to the previous Beta, the second one does not include exciting new features. But, it re-enabled the reveal password option for the login screen, and fixed that user selected cursor theme does not apply to new plasma login manager.

Beta-2 also improved multi-monitor setup support. It fixed inconsistent panel position issue when setting new position on a different monitor, KRunner always opens in the second monitor for the first time, and hitting enter to submit password in primary monitor brings up login prompt on another monitor instead of logging in.

The release fixed various crash issues, include the scenes when fastly pressing Ctrl+Meta+A multiple times, waking up a laptop connected to an external screen, screen powers off after inactivity, and when Media Player widget visibility is changed in system tray while music is playing.

There are as well many fixes for other issues, including cursor jumps around when starting virtual screenshare, 1920×540 (32:9) mode mistakenly selected for Acer 24 CB242Y bmiprx monitor, and screenshot tool does not remember Save As location.

Waterfox integration

Besides bug-fixes, the new Beta also include few minor new features. It added Waterfox support to the plasma-browser-integration, allowing to control media playback, manage downloads, and share links through Plasma’s native tools.

Other changes include:

  • Use a timeout of 10 seconds rather than 60 seconds, for consistency with the screen locker.
  • Use Meta key for desktop switching and Present Windows shortcuts.
  • Fix broken delay functionality for “Detect Window Properties”.
  • Fix the hardware cursor on GPUs without modifier support.
  • Improve mouse emulation, fixes for mouse emulation and unable to disable “use as pointer and keyboard” for Game controller plugin.
  • Fix that Firefox shows graphical corruption when using Wayland subsurfaces.
  • Fix slideshow not working with dynamic wallpapers (day/night wallpapers).
  • Fix long scan issue when mounting removable device with large disk size.

Get Plasma 6.6 Beta 2

The new desktop release has been made into kde-unstable repository for Arch Linux. And, it will probably be made available in Fedora 44 and (K)Ubuntu 26.04 after final release.

For the source, live images, and more details about Beta 2, see the see the official announcement.

  •  

Ptyxis Terminal Emulator Released 49.3 with APX Containers Support

Ptyxis, the free open-source container-oriented terminal emulator, released new 49.3 version few days ago.

As you may know, Ptyxis is a GTK4 terminal emulator that’s default in Ubuntu since 25.10. It features first-class container integration with automatic discovery, direct spawning, and context preservation support for Podman, Toolbox, Distrobox, and JHBuild.

It also features smart process tracking and dynamic theming, that automatically adjust header bar color according to terminal sessions and/or user privilege, as well as searchable tab overview, integrated developer tool, and GPU acceleration.

By releasing version 49.3, the terminal now also support APX containers. APX is the default package manager for Vanilla OS that supports installing packages from multiple sources inside containers without altering the root file-system.

The APX containers basically works with earlier versions of Ptyxis, but they use the label manager:apx instead of manager:distrobox which cause unintended behavior, such as starting new terminal session as root by default rather than normal user account.

Now, the terminal has updated with official APX containers support, and everything should work as same as others.

Besides that, Ptyxis 49.3 improved force-quit fallback priority and tab focus handling when creating new tabs and windows. And, it now automatically clear X11 urgency hint (the notify of needing attention) when window becomes active.

It also added Norwegian Nynorsk translation, improved agent handling of --no-tty/--tty flags for distrobox containers, and added DESKTOP_SESSION info in the debugging information dialog, as well fixed some bugs.

For those who are interested in the next version 50 to be default in Ubuntu 26.04 LTS, the Ptyxis 50 alpha added a logout inhibitor when tabs have active programs running that are not the shell process, which can be disabled by changing the inhibit-logout key value via gsettings command.

And, it added dialog to change profile on per tab basis, new cell-width-scale profile option, as well as ability to set primary/system-accent colors for user palettes. For more about the terminal, see the NEWS file in source page.

How to Install Ptyxis terminal emulator

Ptyxis provides official installer package through Flatpak package, which runs in sandbox environment.

Linux Mint and Fedora Workstation (with 3rd party repository enabled) can search & install it from either Software Manager or GNOME Software.

Ptyxis in Linux Mint Software Manager

For Debian, Ubuntu, and other Linux, do the steps below one by one to install the terminal package:

  • First, open terminal (Ctrl+Alt+T) and run command to install Flatpak daemon:
    sudo apt install flatpak

    Other Linux may follow this setup guide to enable Flatpak support.

  • After that, run the command below to install the Flatpak package:
    flatpak install https://dl.flathub.org/repo/appstream/app.devsuite.Ptyxis.flatpakref
  • And, for those who’ve already installed an earlier version, run this command to check & install updates:
    flatpak update app.devsuite.Ptyxis

After installed the terminal, log out and back in if you don’t see it in start menu.

NOTE: Install Ptyxis Flatpak package in Ubuntu 25.10 and 26.04 won’t override the default one. If you want to set the flatpak as default, see this tutorial and set app.devsuite.Ptyxis.desktop in the config file.

Uninstall:

To uninstall the Flatpak package, use command:

flatpak uninstall --delete-data app.devsuite.Ptyxis

Also run flatpak uninstall --unused to remove useless run-times.

  •  

Notepad Next – Notepad++ Replication for Linux & Mac Released 0.13

Notepad Next, the free open-source Notepad++ re-implementation with native Linux, Windows, and macOS support, released new 0.13 version few days ago.

In case you don’t know about the app, it’s a Qt6-based text editor that replicates the Notepad++ functionality and user interface with cross-platform support.

The text editor is now more than 6 years old, and it promotes itself: “Though the application overall is stable and usable, it should not be considered safe for critically important work.

The latest version so far is v0.13 that was tagged 2 days ago. It added syntax highlighting support for Abaqus input files, improving code readability for editing .inp files.

And, it added ability to click edit on EOL (End of Line) label in bottom status bar, so that user can quickly change the line-ending character between Unix LF (\n), Windows CRLF (\r\n), and Macintosh CR (\r, ASCII 13), without launching preferences dialog.

When current opened and focused file is changed externally (e.g., edited via another text editor), Notepad Next will now pop-up a dialog asking to either reload or keep current file content.

The preferences dialog has been updated with some new options. They include options to toggle line numbers and URL highlights visibility, and configure default directory for file saving.

Other changes include new --workspace option to launch the text editor with specified folder as a workspace, fix that app tried to open file from wrong location when a window already exist with another working directory.

There are as well fix for the search results fonts that are not the same as the main window, new translations, dependency updates, and more.

How to Install Notepad Next Text Editor

The text editor provides official Linux package through Flatpak package, which can be installed directly from either Linux Mint’s Software Manager or Fedora GNOME Software.

While Debian/Ubuntu and other Linux may do the steps below one by one to get it from flathub repository.

  • Open terminal (Ctrl+Alt+T) and run the command below to install flatpak daemon:
    sudo apt install flatpak

    For other Linux, follow the setup guide to enable Flatpak support.

  • Next, run the command to install the Flatpak package:
    flatpak install https://dl.flathub.org/repo/appstream/com.github.dail8859.NotepadNext.flatpakref

And for future updates, run the command below to check & install:

flatpak update com.github.dail8859.NotepadNext

For choice, it also provides AppImage for Linux, which is available to download in Github releases page, along with Windows and macOS packages as well as source tarball:

Uninstall

To uninstall the Flatpak package, run command:

flatpak uninstall --delete-data com.github.dail8859.NotepadNext

Also run flatpak uninstall --unused to remove useless runtime that may free up some disk spaces.

  •  

GIMP 3.0.8 Released with Faster Font Loading, New APIs & Security Fixes

GIMP, the popular GTK-based image editor, released version 3.0.8 last night.

The new version of this free open-source image editor might be the final release in the 3.0 series. It primarily includes bug-fixes and performance improvements, while there are also some minor new features.

First, it noticeably speeds up the app start-up time for users with large number of fonts by backported the changes from GIMP 3.2 RC.

It also backported the gimp_cairo_surface_get_buffer () API to retrieve a GEGL buffer from a Cairo surface, as well as gimp_config_set_xcf_version () and gimp_config_get_xcf_version () APIs to specify a particular XCF version for a configuration.

The release also includes some theme and UX improvements. More GUI elements now respect user’s icon size preferences. Dark mode now looks better by showing less bright texture. And, UI has been updated with more usable Spin Scale widget.

For users who need to run GIMP in command line without display, there’s a new --no-interface command option which may be useful for Linux running GIMP with Flatpak or AppImage package without a separate gimp-console-3.0 executable.

And, the Flatpak package has been improved with safe guards to show the correct configuration directory, regardless of whether XDG_CONFIG_HOME is defined, which makes it much easier for flatpak users to install and use third party plug-ins.

new ‘–no-interface’ option

For macOS, Image Graph is now available when running GIMP with --show-debug-menu option. The app icon is now properly displayed in macOS 26 Tahoe. EPS and PS files can be opened again. And, configuration migrations from GIMP 2.10 to 3.0 has been greatly improved.

Other changes include a new help manual made by Jacob Boerema, as well as fixes for following issues:

  • Lossless WEBP image export affected by lossy settings.
  • Duplicate text in Windows installer for certain languages.
  • Font kerning on macOS
  • Default color profiles loading issue in Windows.
  • XCF incompatibility with GIMP 2.10.
  • Unintended Search pop-up.

There are as well some potential security fixes and other changes, see the official announcement for details.

How to Install GIMP 3.0.8

GIMP provides official installer for Linux, Windows, and macOS which are available to download via the link below:

For Linux, the packages include AppImage which can be run directly without installation after added executable permission. Though, Debian/Ubuntu need to install libfuse2 first.

sudo apt install libfuse2

There’s as well a Flatpak package available in Linux Mint Software Manager and Fedora Gnome Software, while others may install it from flathub repository.

Ubuntu users may simply launch App Center (or Ubuntu Software), search and install it as Snap package:

For Ubuntu, Linux Mint, and their based distributions who prefer the native .deb package, I’ve built GIMP 3.0.8 into this unofficial PPA for Ubuntu 22.04, Ubuntu 24.04 and Ubuntu 25.10.

To add the PPA and install GIMP 3.0.8 deb package, open terminal (Ctrl+Alt+T) and run commands below one by one:

sudo add-apt-repository ppa:ubuntuhandbook1/gimp-3
sudo apt update
sudo apt install gimp libbabl-0.1-0 libgegl-0.4-0t64

NOTE: The PPA packages are built against system default GTK-3 library, which is a bit outdated in 24.04/22.04 and lack the fix for possible crash when drag arranging layers.

  •  

Add Custom Toggle Buttons to Top-right System Menu (Quick Settings)

Want to add custom ON/OFF toggle buttons to the top-right system menu (aka Quick Settings) in Ubuntu, Fedora Workstation and other Linux with recent GNOME desktop? Here’s an extension can do the job!

GNOME since 43 introduced a redesigned system status menu called Quick Settings, allowing to quickly change commonly used settings via ON/OFF toggle buttons.

The menu by default includes the toggle buttons to change the network, bluetooth, night light, keyboard back-light, Light/Dark status, as well as CPU power mode.

If that’s not enough, then you can add more buttons for custom actions, such as automatic suspend and/or webcam toggles. And, here’s how to do the job step by step.

Step 1: Install the Custom Command Toggle extension

The extension so far supports GNOME from version 45 to 49, meaning for Ubuntu 24.04 ~ 25.10, all current supported Fedora Workstation, Debian 13, and Arch etc Linux distributions with GNOME.

First, search and install “Extension Manager” app from your system software app, such as App Center or GNOME Software.

Then, launch Extension Manager and use it to search and install “Custom Command Toggle” extension under Browse tab.

If your Linux Distribution does not have “Extension Manager” app in system repository, then visit the link below in web browser, and use the ON/OFF toggle to install it:

Though, you need to install the browser extension first and refresh to see the toggle. And, Debian/Ubuntu need to install agent package first by running the command below in temrinal:

sudo apt install chrome-gnome-shell

Step 2: Add/Configure Toggle Buttons to Quick Settings

After installed the extension, either go to Installed tab in Extension Manager then click the gear icon to open preferences.

Or, run the command below to launch the preferences from terminal:

gnome-extensions prefs [email protected]

When the preferences dialog opens, you may switch to “Configuration” tab to increase the number of custom toggle buttons (up to 6). And, each button will has its own tab in the dialog.

Next, input the text and icon to be displayed on that button. For Ubuntu with default Yaru theme, see this page for all the available symbolic icon names. And, go to this page for Gnome default Adwaita icons.

And, type the commands for toggle ON/OFF actions. For example, use the command below to enable automatic suspend for both battery and AC mode, for button ON.

gsettings set org.gnome.settings-daemon.plugins.power sleep-inactive-battery-type suspend && gsettings set org.gnome.settings-daemon.plugins.power sleep-inactive-ac-type suspend

And, use the command below to disable automatic suspend for button OFF state.

gsettings set org.gnome.settings-daemon.plugins.power sleep-inactive-battery-type nothing && gsettings set org.gnome.settings-daemon.plugins.power sleep-inactive-ac-type nothing

As you see, you may use && to connect multiple commands into one. And, use pkexec for command that need root permission.

For example, use the command below to disable webcam/camera for button OFF:

pkexec modprobe --remove uvcvideo

And use the command below instead to re-enable for button ON:

pkexec modprobe uvcvideo

NOTE: the modprobe kernel module load/remove commands only work when the module is not in use. If your webcam/camera is being opened by an application, then the commands won’t work.

The initial button state at start up (after login) is by default set to previous state. Advanced users may set it to “Command output”, so it will run the “Check Status Command” automatically at login, and set button state automatically according if that command output matches the “Check Status Search Term”.

For more about the extension, see the official wiki.

  •  
❌